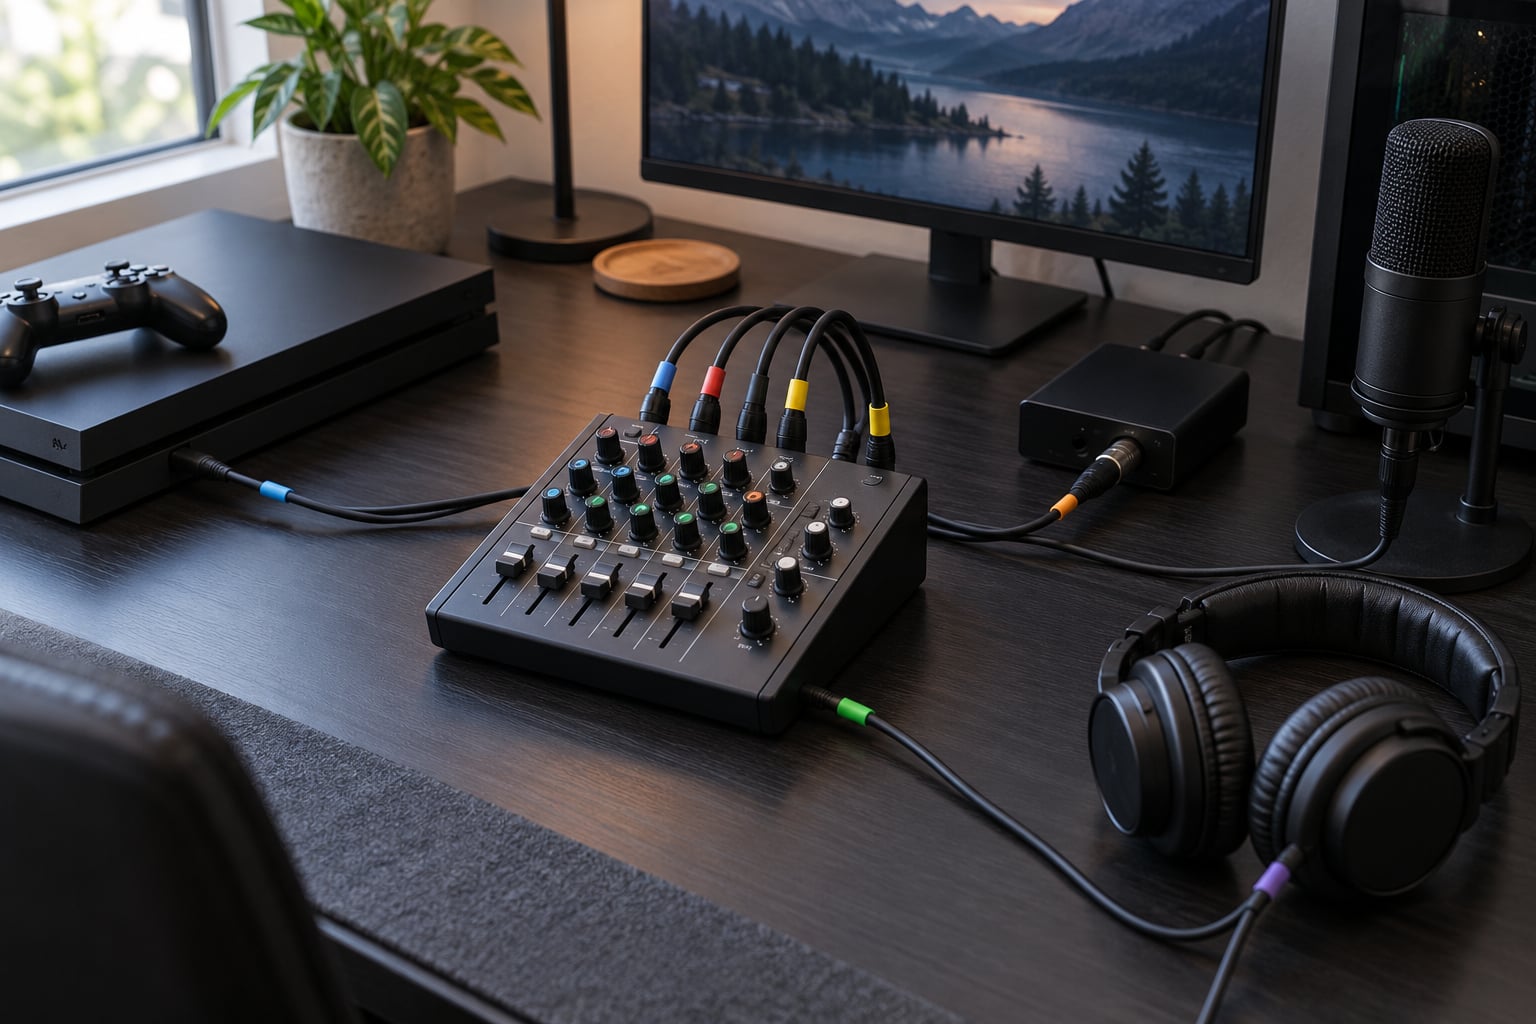
A mixer puts your microphone, game audio, music and alerts on separate channels so you can set each level by ear during a live broadcast. That is the whole idea behind how to use a mixer for streaming audio: every source arrives, gets its own fader, and leaves through one output your streaming software records. The physical work takes about 45 minutes the first time, and the fiddly part is gain staging rather than the cables. Here is the order I work in, and the mistakes that trip up almost everyone on a first setup.
Table of Contents
- What You Need
- Step-by-Step: How to Use a Mixer for Streaming Audio
- Position the Mixer and Label the Signal Flow
- Connect the Microphone and Adjust Its Gain
- Route Game and System Audio
- Add Music or Other Sound Effects
- Set Channel Levels and Build a Balanced Mix
- Use EQ and Compression Conservatively
- Set Up Headphone Monitoring Without Feedback
- Test the Stream and Save the Settings
- Common Mistakes When Using a Mixer for Streaming Audio
- Tips for a Cleaner Streaming Mix
- Frequently Asked Questions
- Can I use an audio mixer with a USB microphone?
- How do I stop my audio mixer from causing feedback?
- Should I monitor game audio through headphones or speakers?
- Do I need an audio interface if my mixer has USB outputs?
- Can I use onboard console or PC audio instead of a mixer?
- Conclusion
What You Need
The hardware list is short. You need the mixer itself, a microphone, whatever produces your game sound, headphones, and the cables to join them. Most beginners can assemble this from gear they already own, because a USB microphone counts as a source and a capture card counts as a game sound source.
- An audio mixer with at least two channels and one main output
- A microphone — dynamic, condenser or USB
- Your game console, PC or a capture card feeding a second machine
- Closed-back headphones for monitoring
- A music source if you want background audio or alerts
- XLR, TRS or 3.5 mm cables, plus phantom power if the mic needs it
Before you plug anything in, learn five labels. Inputs are where signals enter, usually numbered 1, 2, 3. Gain (also called preamp, trim or sensitivity) sets how hard the channel amplifies what arrives. Faders are the sliding volume controls you use during a show, and EQ adjusts bass, mid and treble separately. FX or aux sends are extra outputs for effects or a second mix, and monitor controls decide what you hear in your headphones. Yamaha, Behringer, Zoom, RØDE and RodeCaster units all use these words, though RodeCaster calls faders channels and Zoom often labels gain as a small knob above each fader.
One more distinction matters: a mixer output feeds your computer, while a mixer input receives sound. Plugging two outputs together is the most common wiring mistake, and it produces either silence or a hum.
Step-by-Step: How to Use a Mixer for Streaming Audio
The sequence below goes from physical planning to a saved, tested baseline. Power everything off and unplug the mixer before you move any cable — hot-swapping a phantom-powered microphone into a live input can pop loudly through your speakers.
Position the Mixer and Label the Signal Flow
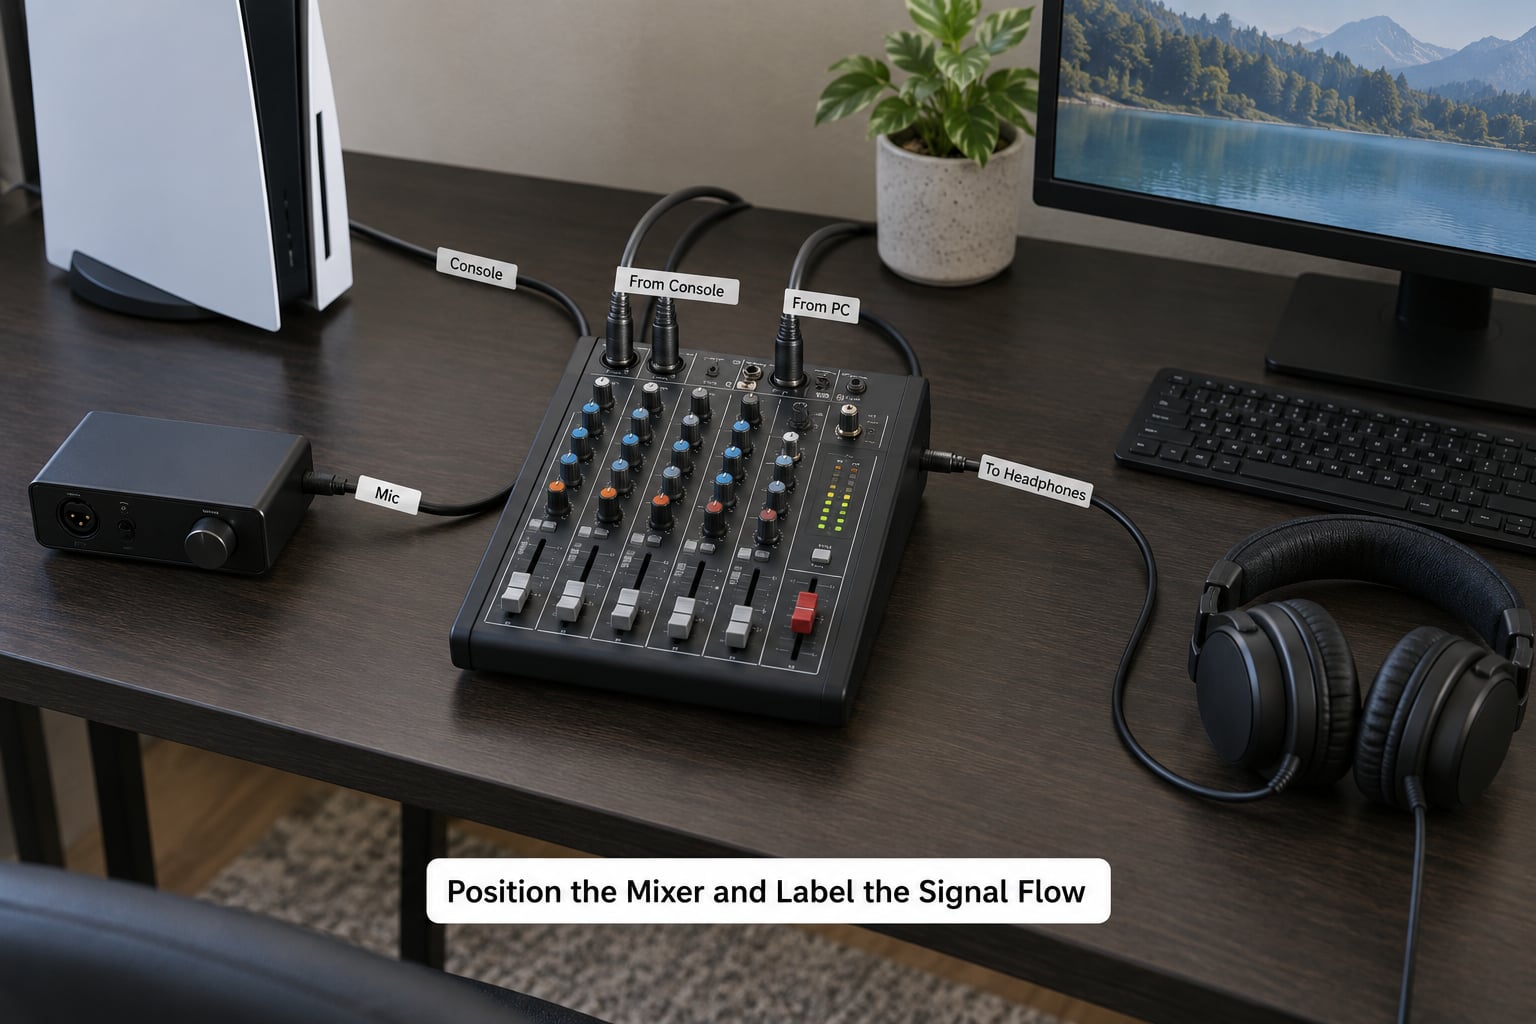
Put the mixer within arm’s reach of your keyboard, not across the room. Then trace the path every sound will take and write it down: microphone to channel 1, game audio to channel 2, music to channel 3, main out to the computer, headphones to the monitor jack. Masking tape and a marker work fine for labels. Streamers on r/streaming and r/obs consistently post the fix for tangled audio problems as labeling cables first and unplugging second, because a labeled setup makes the wrong connection obvious at a glance.
Connect the Microphone and Adjust Its Gain
Plug an XLR microphone into channel 1. Condenser mics need phantom power, usually a small switch marked +48V near the input; switch it on after the cable is seated. Dynamic mics never need phantom power, and sending it to one is harmless but pointless.
Turn the gain knob fully down. Speak at the volume you actually use on stream, raise the gain slowly until your loudest word lands near the top of the green range on the meter, then back it off a touch. That is your working level. Leave a few decibels of headroom above it so a sudden shout or a door slam does not clip. You can see the difference between gain and fader clearly once the fader sits at unity: turn the fader down and the level should drop; if the level does not change, you are turning the wrong control.
Route Game and System Audio
Console and PC sound arrives as a line-level signal. Send it to a line input — the stereo pair labelled 9/10 or 11/12 on many mixers — or to an instrument input with the gain pulled well down if that is all you have. From a capture card, use its line out into the mixer, and the mixer’s main output into the capture card’s line in if you want the processed mix recorded.
Keep the routing one-directional: sources into inputs, the mixer’s main out into the computer. If you route the mixer’s output to another mixer input, or plug a source’s output into your PC’s input while the PC’s output is also going to the mixer, you get doubled audio that no level fix will cure.
Add Music or Other Sound Effects
Music goes on its own channel, usually a stereo or auxiliary input. Lower the source volume on the phone or computer first, then bring the channel fader up, because digital source volume is usually hotter than a microphone. Set music so it sits clearly under speech — you should still understand every word over it. For alerts and sound effects, use a separate channel with its own fader so you can pull them down mid-sentence.
Set Channel Levels and Build a Balanced Mix
Build the mix one channel at a time with the others pulled down, so you are not chasing two sounds at once. Set voice first, since it matters most. Next play real gameplay, not a menu, and note the loudest fight or explosion. Then bring music in underneath.
When game audio competes with your voice, the fix is usually the game channel, not the microphone. Cutting the peaks keeps your levels intact while the game stays clear. Do the same test in a busy voice chat scenario, because Discord audio landing on the wrong channel is a frequent surprise on a first stream; if that happens, fix the routing in your chat application before touching mixer levels.
Use EQ and Compression Conservatively
A high-pass filter on the voice channel, somewhere around 80 to 100 Hz, removes desk rumble and building noise without touching the voice. Cut a little around 2 to 4 kHz if the mic sounds harsh, and reduce 6 to 10 kHz if it gets sibilant. Compression with a 3:1 or 4:1 ratio and a threshold set so it catches only your louder sentences evens out the gap between quiet and loud speech. Move one knob, listen, move the next. If bypassing the channel sounds better, the setting is wrong.
Set Up Headphone Monitoring Without Feedback
Headphone monitoring is the safe way to hear your mix, because the microphone cannot pick up sound leaking from a driver. Keep the mic on a boom arm or desk stand pointed at your mouth and away from speakers, and if you do use speakers, pull them back from the mic and keep the monitor level low. The first sign of a feedback loop is a thin, rising tone that swells — lower the monitor volume immediately and move the mic. It is a physical loop, so no software setting fixes it.
Test the Stream and Save the Settings
Run an unlisted broadcast or a 10-minute local recording and listen back on headphones rather than speakers. Check that speech is clear, game sound has no sudden spikes, music never buries you, and nothing clips during a busy fight. Then photograph every knob position or write the values down. That saved baseline is how you return to a working mix after adding a new game, a new mic or a new alert sound.
Common Mistakes When Using a Mixer for Streaming Audio
Nearly every rough first stream traces back to one of these. Each has a specific correction rather than a general “turn it down” answer.
- Clipping from too much gain. The red light or a distorted, crackling voice means the preamp is too hot. Turn the gain down until your loudest word stays in the green, then bring the fader up to taste.
- Feedback from open speakers. A rising whistle is a physical loop between the mic and the monitor. Switch to headphones and the loop disappears instantly.
- Doubled audio from wrong routing. If you hear your own voice twice, or game sound at two volumes, two paths are feeding one destination. Unplug everything, then reconnect one cable at a time.
- Desktop sound leaking into the mic. A dynamic microphone on a desk picks up fan hum and case vibration. Move it off the case onto a boom arm, or add a low-cut filter.
- Music louder than speech. Set music roughly 15 to 20 dB below the voice channel and re-check it during a busy scene, not a quiet menu.
- Treating the monitor mix as the stream mix. You can monitor louder or with effects that viewers never hear. Check the actual recording before assuming the stream is broken.
- Fighting software instead of hardware. If levels already look right in the mixer, leaving OBS audio monitoring off for the mic channel stops double-processing, which is a common cause of the echoey, hollow voice new streamers report.
Tips for a Cleaner Streaming Mix
Record a 60-second baseline of your voice every few streams and compare it against the last one, because your setup drifts as you move cables and swap scenes. Make one change at a time and listen to the result immediately. Check audio after any scene or game that sends different sound, since a scene change is often where a hidden source appears. Label your channel strips so a new stream day needs no guesswork. When a compressor is working, its gain-reduction indicator should blink regularly and briefly; steady or pinned reduction means it is squashing everything.
Two questions come up constantly on streaming forums: whether hardware mixing is even still worth it when software tools exist, and what to do when the mixer is not recognized by Windows or OBS. Both have simple answers. Hardware mixing still wins when you want tactile control that does not depend on a window, and a mixer usually appears as a normal USB audio device — check the sound settings and pick the mixer as the default input if it is missing.
Frequently Asked Questions
Can I use an audio mixer with a USB microphone?
Yes, and most compact mixers have a USB input built in for exactly that. Plug the mic into the channel, set your gain and phantom power as needed, then treat that channel like any other source. If your mixer has no USB mic input, a USB mic still works by running it into a line input, though you will lose the mixer’s preamp control over it.
How do I stop my audio mixer from causing feedback?
Feedback is a physical loop, so software settings will not cure it. Switch to headphone monitoring, keep the microphone aimed at your mouth and away from any speaker, and lower the monitor volume until the thin rising whistle stops. If you must use speakers, move them well behind the mic and keep them quiet. Positioning alone fixes most cases.
Should I monitor game audio through headphones or speakers?
Headphones, almost every time. They let you hear the mix at a realistic level without the microphone catching speaker output, which removes the feedback risk entirely. Speakers sound more comfortable to some people, but they only work safely with the mic pointed away and the monitor level low. Test with headphones first, then decide.
Do I need an audio interface if my mixer has USB outputs?
No. If the mixer sends a USB signal straight to your computer, it is already acting as the interface and nothing extra is needed. An interface becomes useful when you outgrow the mixer: more inputs, better preamps, hardware monitoring or separate headphone control. Add one later rather than buying both at the start.
Can I use onboard console or PC audio instead of a mixer?
You can, and plenty of successful streams start that way. The trade-off is control: onboard audio usually means one system slider, so you cannot independently adjust voice, game and music, and you cannot build a separate headphone mix. Learning how to use a mixer for streaming audio is worth it once you add a second source or move to a dual-PC setup.
Conclusion
Start small. Connect one source, set its gain until the loudest word sits in the green, add the game channel underneath, and record a short test before you touch EQ or compression. Once that baseline sounds right, the rest of how to use a mixer for streaming audio is just careful listening and one adjustment at a time.