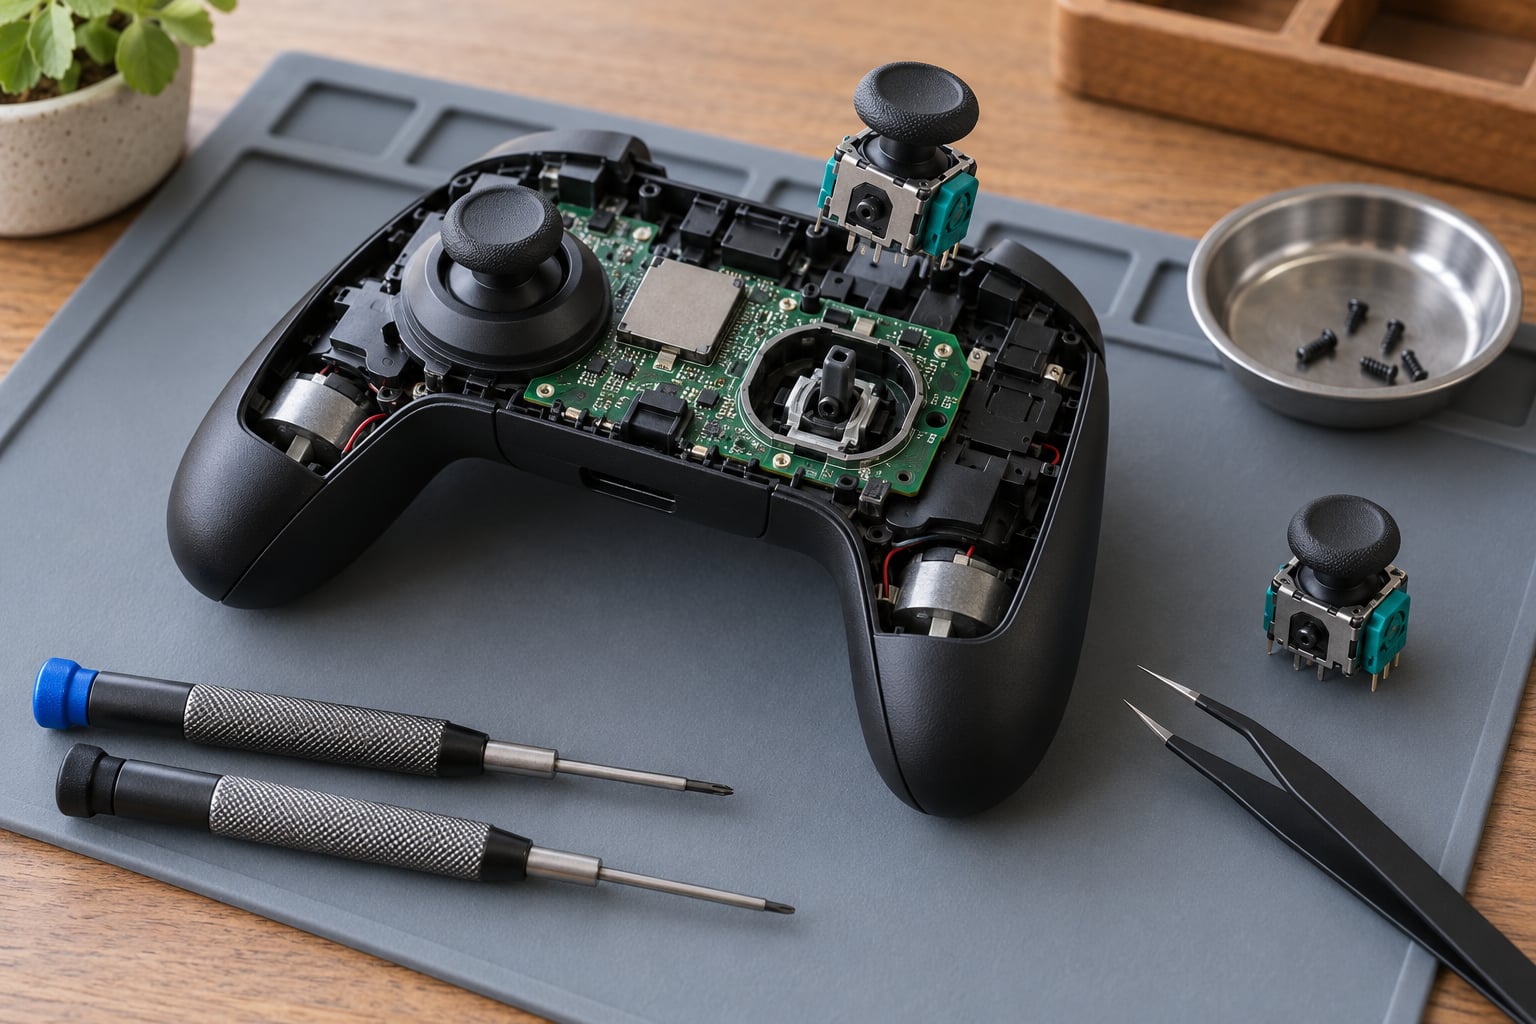
Replacing thumbsticks is one of the most satisfying controller repairs you can do, and most models come apart with a Phillips or Torx driver. The catch is that on the majority of game controllers the stick modules are soldered straight to the board, so you will need an iron, flux and a steady hand — a solder-free swap only works on the few models with modular stick units.
Budget 45 to 90 minutes for the first attempt on a soldered controller and about 20 minutes on a modular one. This guide walks through how to replace thumbsticks on a controller end to end: matching the part to your exact model, desoldering the old module without lifting a pad, installing the replacement and testing it properly.
Table of Contents
- What You Need
- Parts
- Tools for a soldered controller
- Tools for a modular controller
- How the methods differ by controller
- Step-by-Step
- 1. Identify Your Controller Model and Replacement Type
- 2. Power Down and Prepare the Controller
- 3. Remove the Controller Shell
- 4. Expose and Remove the Old Thumbsticks
- 5. Install the New Thumbsticks
- 6. Reassemble and Test the Controller
- Common Mistakes
- The part does not fit
- Stripped or chewed screw heads
- Cracked shell
- Lifted pads
- Cold or dull joints
- Bridged pins
- Drift that survives the replacement
- Loose parts after reassembly
- Frequently Asked Questions
- Can I replace thumbsticks on any controller?
- Do I need to solder the new thumbsticks in place?
- How do I know which replacement thumbsticks will fit?
- What should I do if the controller still drifts after replacing them?
- Can I replace thumbsticks without opening the controller?
- How long does a controller thumbstick replacement take?
- Conclusion
What You Need
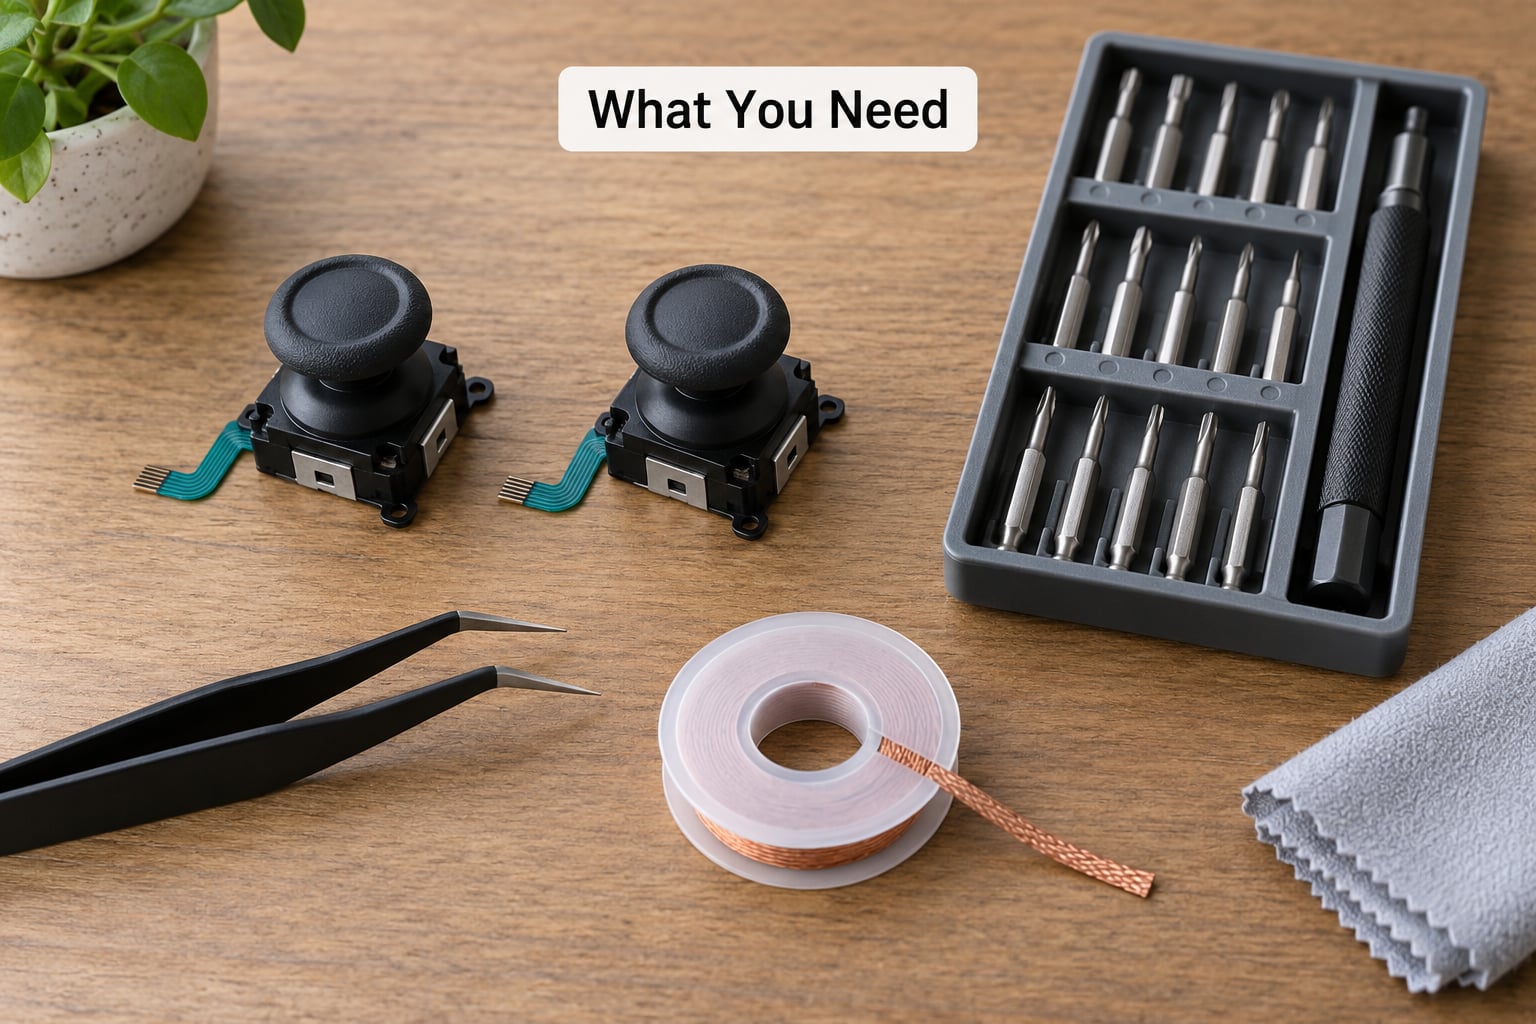
The short version: a precision screwdriver, tweezers, replacement thumbsticks that match your controller model, and either a soldering iron or nothing at all depending on the model.
Parts
- Replacement thumbsticks matched to the exact controller model, not just the brand. Stick heights and pin layouts differ even between versions of the same pad.
- Replacement screws if yours are stripped or the head is chewed up. Cheap insurance when you are already open.
- Isopropyl alcohol and a lint-free cloth for cleaning flux residue off the board.
Tools for a soldered controller
- Temperature-controlled soldering iron with a fine chisel tip. A fixed-temperature iron is the usual cause of burnt pads on a first attempt.
- Flux, either a liquid with a brush or a no-clean pen. Without flux, solder beads up and refuses to leave the old joint cleanly.
- Lead-free-compatible solder wire or, if your board tolerates it, leaded solder, which flows far more easily at low heat.
- Desoldering pump or braid for clearing the through-holes, plus a pick for freeing the solder from the underside.
- Hot air station if you want an easier removal. One repair thread describes a module with 14 soldered pins and reaching for hot air and a helping hand rather than an iron and pump, which is a common recommendation for first-timers.
Tools for a modular controller
A plastic opening pick or spudger, a driver, and tweezers. That is the whole list. No iron, no flux, no risk to the board.
How the methods differ by controller
This table is the single most useful thing to check before you buy a part or open a shell.
| Controller | Stick module type | Soldering needed | Worth knowing |
|---|---|---|---|
| Xbox One controller | 14-pin through-hole potentiometer module | Yes | Sticks sit side by side on the main board and must come off one at a time |
| Xbox Series X|S controller | Soldered module | Yes | Microsoft runs an official parts and repair program, which is worth checking before you start |
| DualShock 4 (PS4) | Soldered module | Yes | Stick heights differ from older pads, so the shell will not close with the wrong part |
| DualSense (PS5) | Soldered module | Yes | Some revisions ship with different stick heights; measure before ordering |
| DualSense Edge | Modular plug-in sticks and paddles | No | Edge stick modules do not fit a standard DualSense, per community reports |
| Switch Pro Controller | Soldered module | Yes | Tray screws hide under the stick caps, so the shell lifts in two halves |
Matching the part is mostly a matter of shape. Compare the stick cap diameter, the height from the top of the module to the top of the cap, and the cable or pin layout against your existing module before you pull anything. If the seller lists a model number, match that.
Step-by-Step
1. Identify Your Controller Model and Replacement Type
Start by reading the model number on the back label, usually above the battery door, and searching that number rather than the brand name. Xbox alone has half a dozen current and legacy models with different internals, and Sony has four in the same generation line.
Next, look at how the sticks attach. If you can see a small ribbon cable running from each stick into the board rather than bare metal pins, you have a modular controller. If you see metal pins going straight through holes in the board, plan on desoldering.
Check how the stick feels right now. A stick that drifts at rest usually has a worn potentiometer, and replacing it with the same part type gets you a working controller but not a better one. Hall effect and TMR modules read position magnetically with no physical contact, which is why they do not drift. Players repeatedly weigh the two against each other, and the recurring view in those threads is that TMR modules feel smoother because the sensing is finer-grained, while Hall effect units are the more established option.
2. Power Down and Prepare the Controller
Shut the controller down fully, then unplug a wired connection or let it sit out of pairing range. If it takes batteries, take the batteries out and note which way round they went before you set them down.
Clear a table with good light. A plastic tray or an empty parts case per screw group beats a pile of mixed screws every time. If you plan to solder, work on a surface that resists heat, and keep a small bowl nearby for the screws you remove so nothing rolls under the desk.
3. Remove the Controller Shell
Most shells are held by a mix of Phillips, Torx and security screws, and different models use different sizes. A T8 Torx screw in a T6 hole is a common find and will strip if you force it, so test the driver by feel in one corner first.
Release the perimeter clips with a plastic opening pick, working slowly around the edge. A pick that meets resistance should never be pushed harder; slide it along the seam until it drops into the clip. Flexing the shell is what causes cracks, so let the picks do the work instead of your hands.
Some controllers hide screws under the stick caps, under the trigger guards or behind the battery door. Check those before pulling on the halves. A good success check at this stage: the two shell halves separate without force and every screw you removed is in its tray.
4. Expose and Remove the Old Thumbsticks
Once the shell is off, the stick module is usually the only component held down by its own screws, with a cable or a set of pins feeding into the board. Put the controller on a mat so the screws cannot fall behind it.
For a soldered module, work from the solder side. Flip the board, add fresh flux over each joint, and heat each pin one at a time while pulling gently on the pin with tweezers. Do not heat all the pins at once; molten solder bridges neighbouring pins and you will spend longer cleaning that mess than the original swap took.
Clear each hole with the desoldering pump, or wick the remaining solder with desoldering braid and the iron. Hold the pump away from the board while you depress it so nothing flies out, and count the pins as you go so you know nothing was left behind.
For a modular module, release the cable connector with a pick, lift it straight up, and keep the cable with the module. On the PS5 DualSense, the two stick modules are separate parts with different heights, so swap them one at a time and keep each cable with its own board socket.
Success check: the board should show clean, shiny holes with no solder clinging to the pads and no pad lifting from the board surface. A dull hole usually means a little more heat and flux is needed.
5. Install the New Thumbsticks
This is where people lose pads, so slow down. Installing the new module goes wrong far more often than removing the old one did.
For a plug-and-play module, drop the new unit into its moulded recess and press the cable into the connector until it clicks or sits flush. Check the cable is oriented correctly and not pinched under the module body, then screw it down snugly without crushing the plastic.
For a soldered module, seat it on the board so all pins go through straight and the body sits flat against the surface. If the pins do not line up by eye, stop and check that the module is the right one — forcing it bends pins and tears pads. Add flux, then touch the iron to a pin and feed a small amount of solder into the joint. Work pin by pin; the joint should look shiny and slightly domed, not a dull grey blob.
Clean the board with isopropyl alcohol and a cloth so residue does not creep under the module. Let everything cool properly before moving the controller, since flexing a board while it is still warm can crack a joint that looked fine.
Success check: from the solder side, every joint is shiny, the pads are flat and level with the board, and no two pins share a bridge of solder.
6. Reassemble and Test the Controller
Put the board and any ribbon cables back exactly where you found them, checking that nothing is pinched between the shells. Seat the cover, tighten screws evenly in a criss-cross pattern rather than by hand-tightening each corner in turn, and check the controller powers on before you put the screws all the way in.
Test the analog input properly instead of wiggling it once. Open your controller settings, view the raw stick input on screen, and centre the sticks without touching them. Then push each direction fully and hold it for several seconds, watching for movement when the stick is centred.
Most platforms run a calibration routine the first time a controller connects, and if the stick reads a constant offset, run it again after a full power cycle. Then test in a game with a calibration screen that shows a full circle. Anything less than a clean circle means a problem worth chasing before you close the controller up.
Finally check the rest: every face button, each shoulder and trigger, the menu buttons, rumble and the connection mode you actually use. Drivers that fit a standard pad cover hide button problems, so remove it for a minute.
Common Mistakes
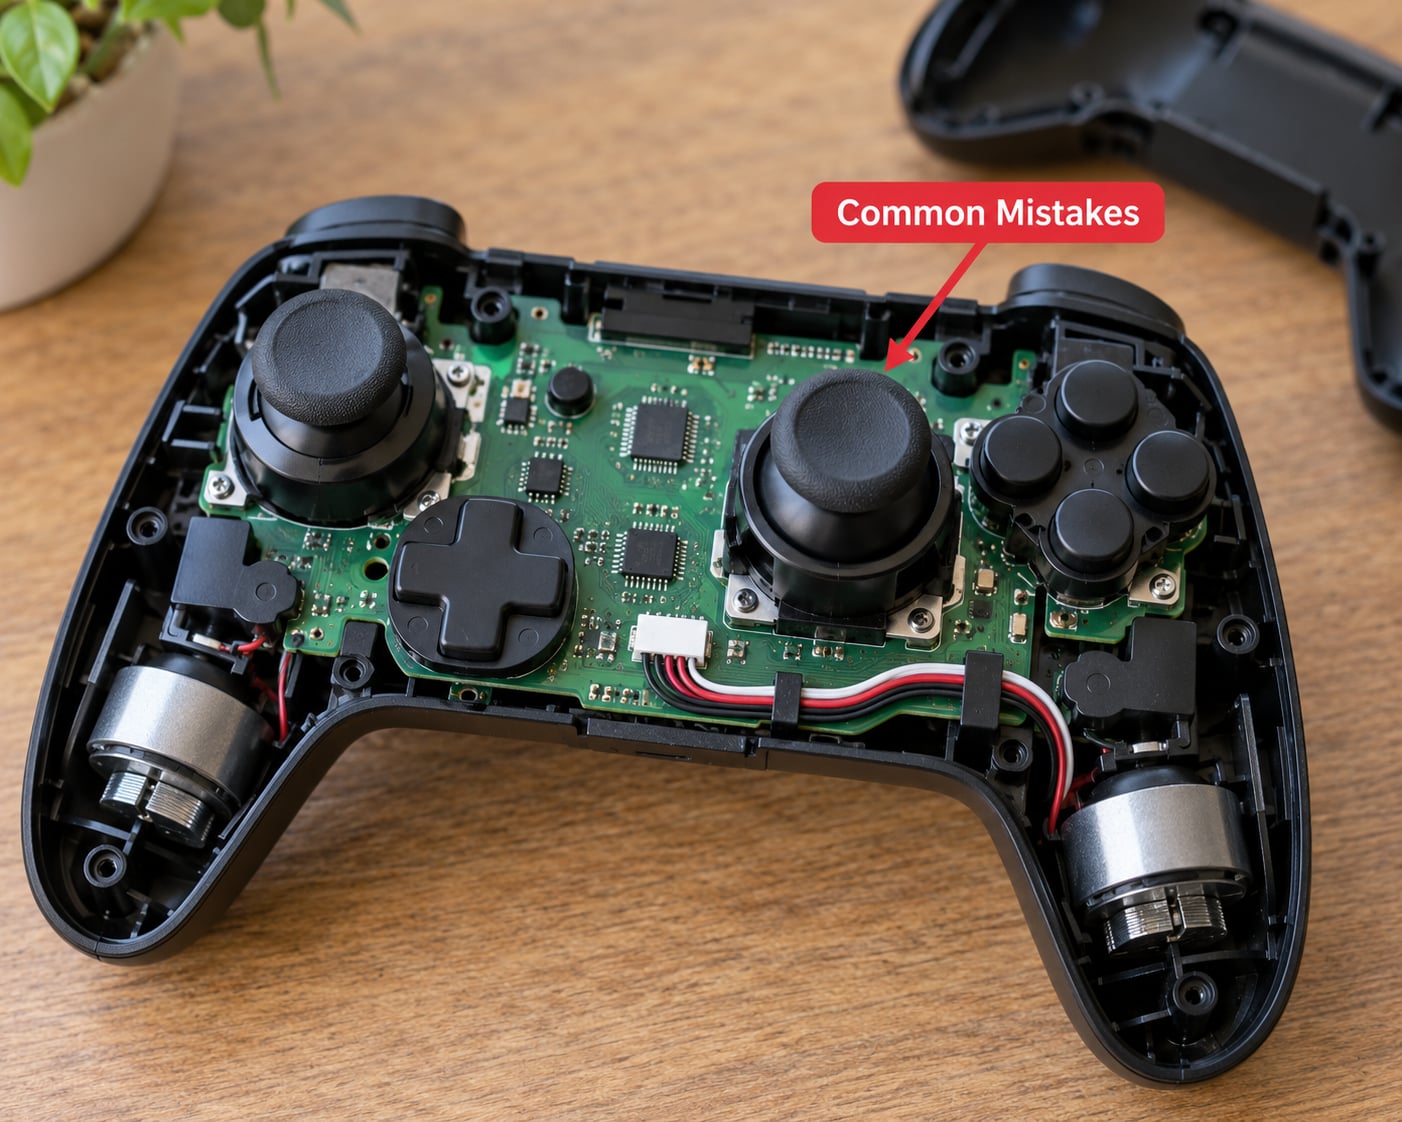
The part does not fit
Almost always the wrong model. Stick height and post shape vary between revisions, and a module that sits proud will stop the shell closing. Check the model number on the label rather than the branding on the front, and measure before you solder.
Stripped or chewed screw heads
You used the wrong driver or too much pressure. Put a rubber band over the stripped head for grip, or use a screw extractor bit. Better still, place a bit of tape over the head so the driver has something to bite, and stop pushing as soon as the screw starts to move.
Cracked shell
Forcing clips, prying near a screw post or trying to reseat a module while the shell is pinched. Small cracks near the trigger area are cosmetic, but a crack that runs into a screw post means the case will not hold screws properly. Work the perimeter with a pick in short strokes and let clips clear naturally.
Lifted pads
This is the classic beginner failure, and repair threads about controller jobs describe it constantly. A pad lifts when you pull a pin sideways while the solder underneath is still solid. Prevention is the whole game: heat the joint fully, wait for the solder to actually go liquid, and lift straight up. If it has already happened, anchor the pad with a dab of epoxy, then run a fresh wire from the pad to the nearest intact trace or component leg.
Cold or dull joints
A joint that looks matte grey instead of shiny silver usually means the iron was not hot enough or the joint was not fluxed, so the solder never melted properly. Reheat with fresh flux until it flows shiny and wet-looking, and leave the iron a couple of seconds longer on each pin. Intermittent drift on a fresh stick is nearly always this.
Bridged pins
Two pins sharing one blob of solder will short the sensor out. Use the iron to separate them, add flux, then wick the excess off with braid. With 14 pins on a module, bridges usually happen at the two pins closest to each other, so check those first.
Drift that survives the replacement
If the stick still drifts with a new module fitted, the problem is probably not the stick. Clean the contacts inside the stick cavity where the module sits, check the ribbon cable for a bad connection, and rule out drift from other inputs such as triggers. One more possibility worth checking is the software side: a controller that drifts in every game but sits perfectly still in the system test screen needs calibration or a deadzone adjustment, not another soldering job.
Loose parts after reassembly
Something is not clipped, seated or screwed down. Most often it is a screw left out, or a cable sitting on top of the board instead of under its clip. Leave the controller on a flat surface for a day and listen for rattles before you assume the job is finished.
Frequently Asked Questions
Can I replace thumbsticks on any controller?
Nearly all modern controllers can have their thumbsticks replaced, but the method differs. Xbox One, Xbox Series, DualShock 4, DualSense and Switch Pro controllers all use soldered modules, so you need an iron and flux. The DualSense Edge uses modular stick units that plug in and out with no soldering at all. Older first-party Xbox pads take completely different modules, so always match the model number before ordering.
Do I need to solder the new thumbsticks in place?
Only if your controller uses soldered modules. You can tell by looking at the board: bare metal pins passing through holes mean soldering, while a flat ribbon cable into a small connector means a plug-and-play swap. If you have never soldered before, buy a kit with a temperature-controlled iron, flux and braid, and practise on a scrap board first. Heat each pin one at a time and pull straight up.
How do I know which replacement thumbsticks will fit?
Match the model number printed on the controller label, not the brand name on the front. Then compare three things against your existing module: the cap diameter, the height from board to top of cap, and the pin or cable layout. A module that is slightly too tall will stop the shell closing, and the wrong pin layout will not line up at all. When in doubt, measure before ordering.
What should I do if the controller still drifts after replacing them?
Test the raw stick input on screen first with the sticks untouched. Movement from centre means the drift is real, and a fresh module plus a clean, seated cable usually fixes it. If the stick sits still in the system test but drifts in games, you need calibration or a small deadzone adjustment instead. Drift that only happens wireless also points to interference or power saving rather than the stick hardware.
Can I replace thumbsticks without opening the controller?
Only on controllers with modular stick caps, where the rubber or plastic cover pulls off the top of an existing module without touching the shell or the board. That refreshes a worn grip but does nothing for drift, because the potentiometer underneath stays in place. Any actual module replacement means opening the controller, and on soldered models it also means desoldering.
How long does a controller thumbstick replacement take?
Allow 45 to 90 minutes for a first soldered swap, including opening the shell, clearing the old joints and cleaning the board. A modular controller takes about 20 minutes because there is no solder involved. Add another 15 minutes if you also replace buttons or the charging port, since each extra joint adds failure points and the shell needs to come apart fully.
Conclusion
Read the model number off the back of your controller, then decide whether it is a soldered or modular design before you order anything. That single check is where most repair jobs go right. If it is soldered, get flux and a temperature-controlled iron first, because those two items decide whether the job is easy or a morning of troubleshooting. Then open the shell slowly, work one pin at a time and check the raw stick input on screen before you screw the controller back together.