Sticky controller buttons usually come down to one thing: residue. Sweat, skin oils, dust or a sugary drink spill leaves a film in the gap between the button and the shell, and the button starts to feel tacky, register a phantom press, or fire only every third time. Here is how to clean sticky controller buttons without opening anything: dampen a cotton swab with 90-99% isopropyl alcohol, squeeze out the excess, run it around the button edges, press the button repeatedly to work the solvent into the crevice, pick out loose debris with a toothpick, and let it dry for 5 to 10 minutes. The whole job takes about ten minutes and no special tools. Opening the controller is a second stage for when grime has already seeped under the rubber membrane.
The physics behind it matters more than people expect. Each button cap sits above a flexible silicone membrane carrying a small conductive carbon dot. Press the cap and the dot bridges a pair of metal contacts on the board underneath, completing the circuit. Skin oils and drink residue coat that dot and stop it conducting cleanly, and the same gummy film on the shell wall physically glues the cap to its recess. Isopropyl alcohol dissolves the film and evaporates without leaving anything behind, which is exactly why it beats most household liquids.
The routine that works in practice is unremarkable: swab the button edges, agitate with a soft natural-fibre brush, blow it out, and only reach for a full teardown when surface work has failed. One warning from repair technicians is worth repeating, though. Isopropyl can permanently dull glossy plastics, so keep it off the outer shell and confine it to crevices. That single warning is the reason the steps below put the swab first and the open controller second.
Most light cases clear up in minutes. A heavier spill, or buttons that feel gritty rather than tacky, needs the deep clean later in this guide. Worth knowing too is that a controller can arrive sticky out of the box, which is a manufacturing fault rather than something you caused.
Table of Contents
- What You Need
- Step-by-Step: How to Clean Sticky Controller Buttons
- 1. Turn Off and Test the Controller
- 2. Clean Around the Buttons First
- 3. Wipe the Button and Contact Area
- 4. Open the Controller for a Deep Clean
- 5. Remove Residue and Let Everything Dry
- Common Mistakes
- Frequently Asked Questions
- Is isopropyl alcohol safe for controllers?
- Can I use 91% isopropyl alcohol to clean my Xbox controller?
- What is the best way to clean sticky controller buttons?
- Why do my controller buttons get sticky?
- Can you clean sticky buttons without rubbing alcohol?
- Should I clean the controller or replace it?
- Conclusion
What You Need
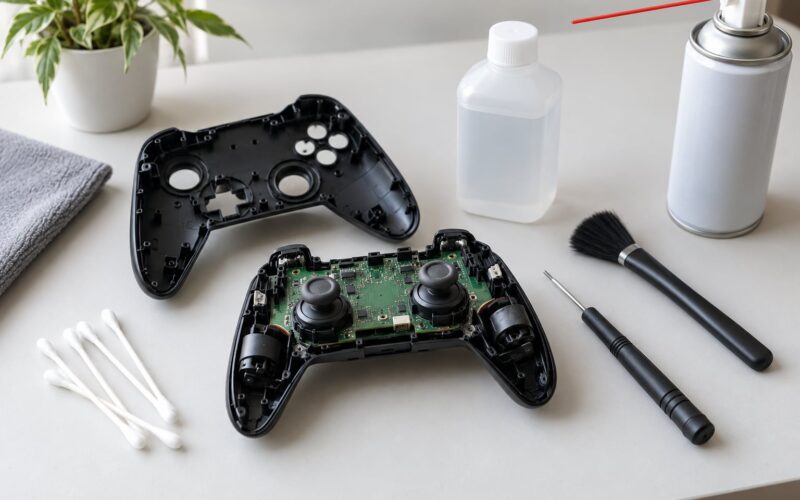
You do not need a parts kit or a repair manual. Everything below costs about as much as a takeaway meal and lives in a drawer somewhere.
- 90-99% isopropyl alcohol. Higher concentration evaporates faster and leaves less water behind. A bottle of 99% is the ideal buy; 91% works fine and is easier to find. Avoid 70% where possible, because the water fraction is exactly what leaves a new film behind and you end up cleaning twice.
- Cotton swabs (Q-tips). Use them damp, not soaked. Squeeze the shaft between your fingers until almost nothing comes out. A dripping swab pushes liquid past the membrane and under the board.
- A soft-bristle toothbrush. An old one is fine. Natural or painter’s bristle, never stiff nylon, because you will be brushing near contacts and static from a plastic bristle can hurt.
- A wooden toothpick. For packed-in debris and dried sugar crystals sitting in the corners of the recess.
- Compressed air in a can. Good for blowing dust out of crevices before and after any liquid work. Hold the can upright and blow in short bursts.
- A microfibre cloth. For the shell and grips, and for checking that no solvent has pooled somewhere you cannot see.
- A small cup or cap. Pour a shallow pool of alcohol rather than carrying the bottle around your desk. It keeps the bottle closed and upright while you work.
- Optional: a plastic opening pick and a Torx driver. Only needed for the deep clean. Many PS5 DualSense, Xbox Series and Elite Series controllers use Torx screws, sometimes security-head Torx that strip easily if you force them.
Check your manual before any liquid touches the controller. Sony, Microsoft and Nintendo all restrict alcohol around the touchpad and the gloss on the shell, and a battery is the one component you never want to wet. If your specific model says something different from what is written here, the manual wins.
Step-by-Step: How to Clean Sticky Controller Buttons
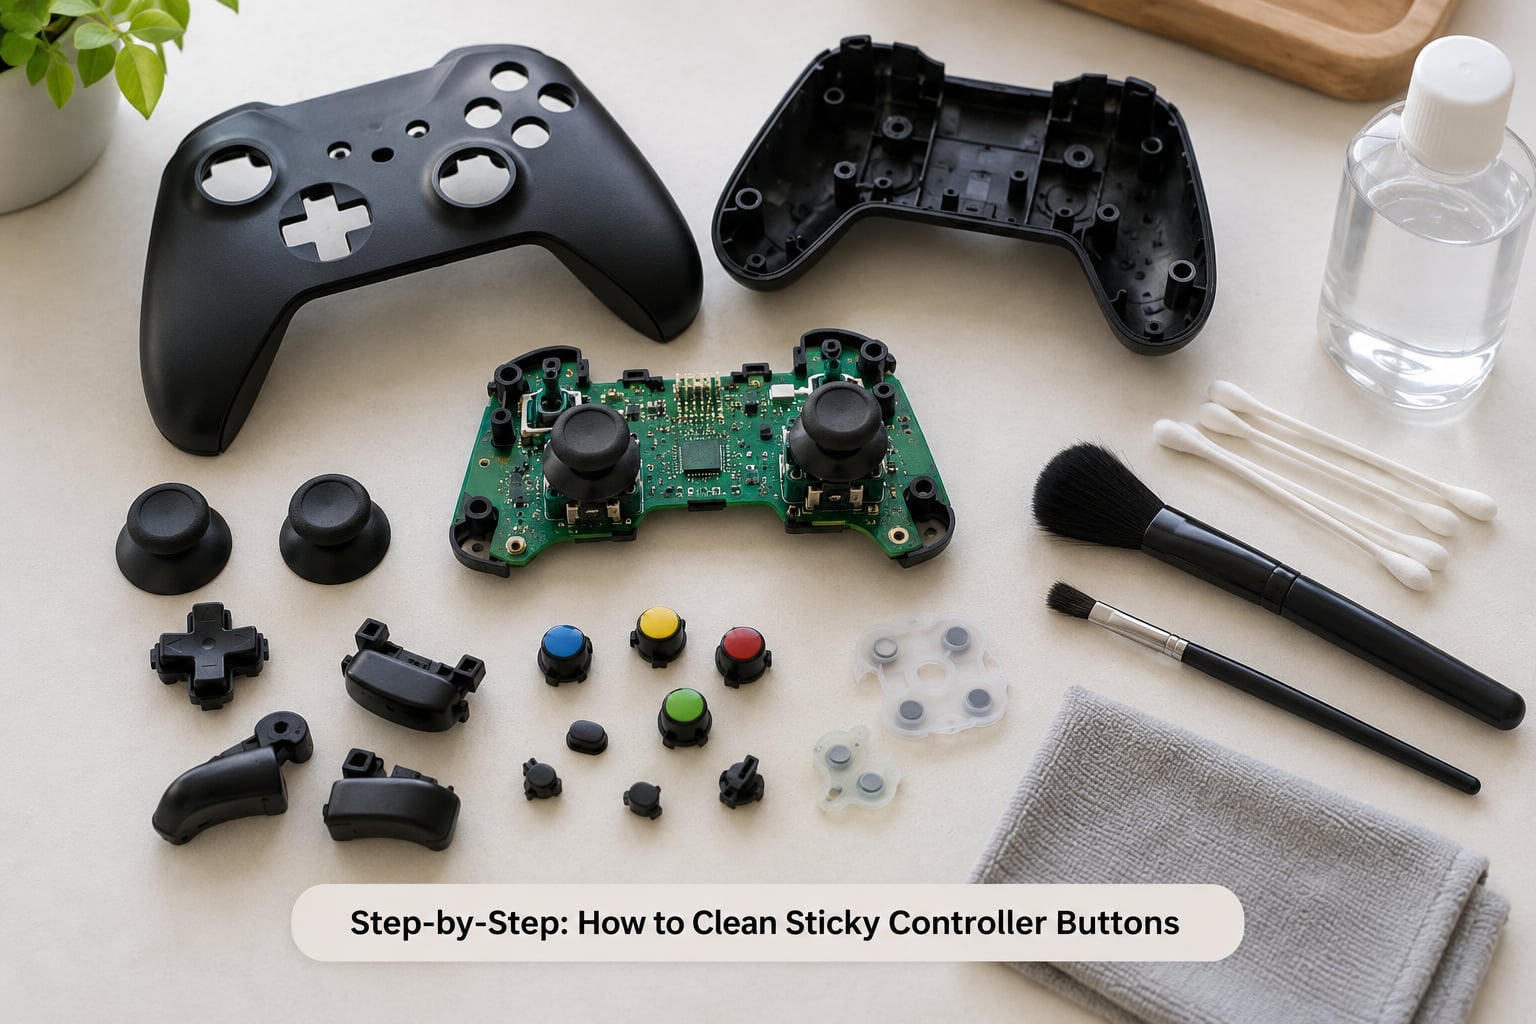
1. Turn Off and Test the Controller
Power the controller down and remove the batteries before anything else. Wired controllers get unplugged from the console or PC. Pulling the battery pack on a DualSense or an Xbox controller also tells you where the shell seams are before you commit to opening it later.
Now press each sticky button ten times and watch what happens. A button that feels tacky but returns fully is almost always residue on the cap wall. A button that stays down and keeps registering input points to something heavier in the well, or a stretched membrane. A button that feels gritty and springy may have dirt packed under the cap rather than a sticky film, which is a different clean.
Do a quick thumbstick test at the same time: push the stick to each edge and let it sit. If it drifts back on its own, that is stick drift, a worn potentiometer issue, and cleaning will not touch it. Separating those two problems early saves you from opening a controller that never needed opening.
2. Clean Around the Buttons First
Start with the dry methods, because they carry no risk. Hold the controller face-down at a slight angle so loose debris falls away instead of deeper into the recess, then blow compressed air around the button cluster in short bursts.
Next, run the soft toothbrush around the outside of the button and into the gap where the cap meets the shell. Brush with light pressure. You are loosening dust and dried grime, not scrubbing the plastic. Follow up with the compressed air again to clear what the brush lifted.
Anything chunky comes out now rather than later. Run a toothpick along the seam of the button recess and lift out dust bunnies and any sugar crystals you can see. This is the stage that resolves most mildly sticky buttons on its own, and if the button already feels free afterwards, you have saved yourself an alcohol swab and ten minutes of drying time.
3. Wipe the Button and Contact Area
Dampen a cotton swab in the 90-99% isopropyl alcohol, then squeeze it between your fingers until it is barely damp. That single detail decides whether this works or creates a new problem. A properly damp swab wets the crevice; a wet one floods past the membrane and can reach the battery or the board.
Run the swab slowly around the entire edge of the button and inside the recess, rotating it as you go so you are always using a clean face against the plastic. The trick to how to clean sticky controller buttons is to treat the seam like a seam rather than scrubbing the middle of the cap, since the cap itself rarely holds grime. The stubborn grime lives in that 1-2 mm gap between cap and shell.
Press the button in and out ten or fifteen times while the alcohol is still wet. This pushes the solvent down the wall of the recess and into the membrane gap where the residue actually lives. It is the step people skip, and it is the reason a single swab pass fixes only half the problem. Take a fresh swab and repeat once if the first one comes back grey or tacky.
Wipe the cap and the surrounding shell with a microfibre cloth dampened with alcohol, but keep it off glossy surfaces and the touchpad. Then leave the controller alone for 5 to 10 minutes. Do not plug it back in the second the surface looks dry, because alcohol feels dry well before it has finished evaporating out of the recess.
4. Open the Controller for a Deep Clean
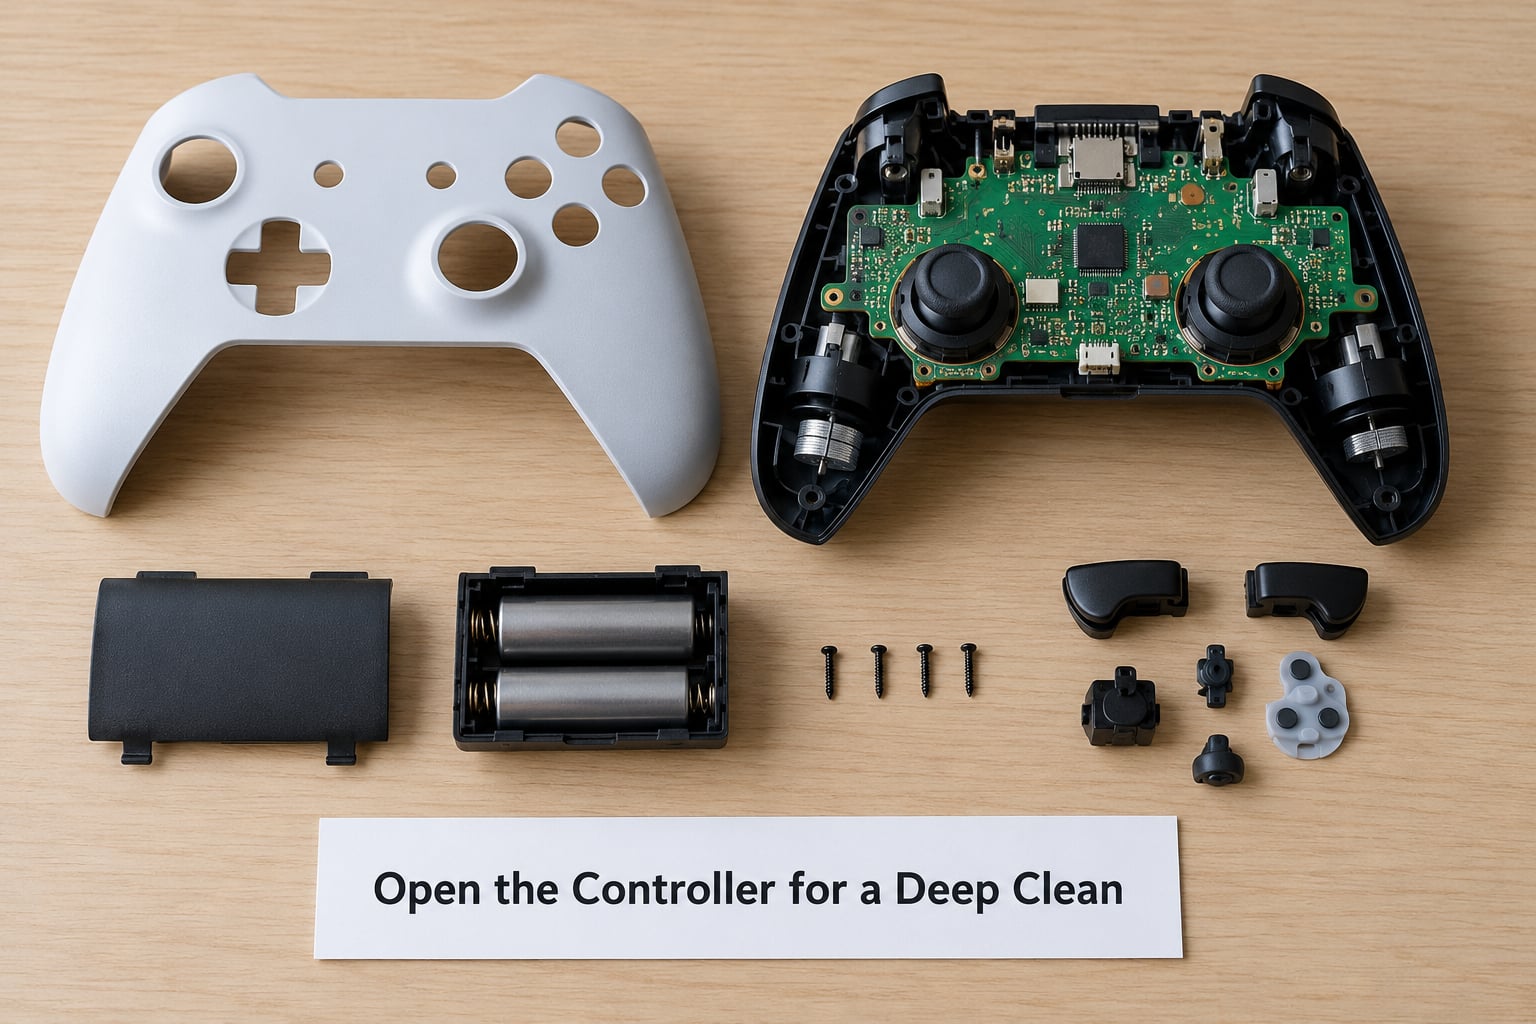
Open the controller only if the button still sticks after two proper swab cycles. This stage applies to a residue spill that has reached the membrane, and to third-party pads whose shells come apart more easily.
Start with a magnetic tray or a piece of tape so the screws survive. Note their positions as you go, because the lengths differ and a long screw in a short hole will sit proud against the membrane. Many modern controllers use Torx screws, so match the driver exactly and never force a stripped head. A stripped screw costs you the shell, not just the screwdriver bit.
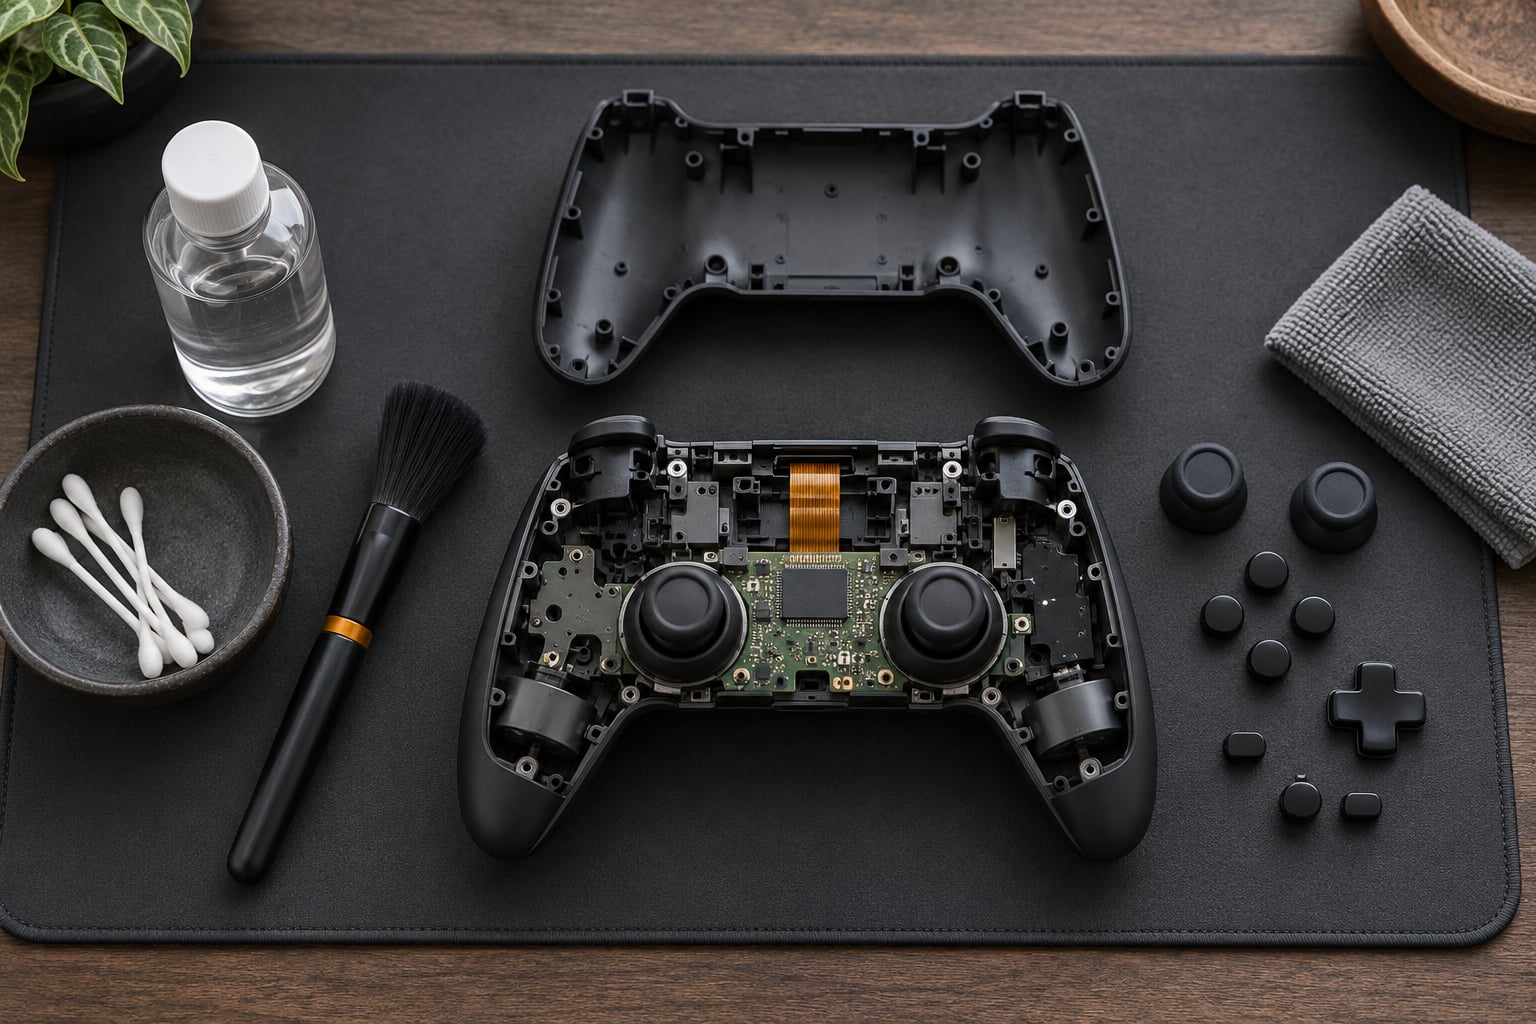
Remove the back plate or faceplate and lift the button caps out with a plastic opening pick. The caps are keyed and only seat one way round, so line each one up with its slot before pressing back. Pry gently from the edge, never lever against the membrane underneath.
You will see the rubber membrane sheet sitting over the board contacts, one raised nub per button. The residue sits right there. Take a photograph before you go further so you know how the ribbon cables and the touchpad connector are oriented, and never pull or pry an attached flex cable. They are soldered at one end and meant to lift out of a socket, not come off.
For plastic shell and cap parts only, a wash in warm water with a drop of washing-up liquid is the most thorough option. Keep every liquid away from the membrane, the board and the battery. Rinse thoroughly, then dry with a cloth before anything goes back together. Soapy water does clear sticky residue effectively, but it leaves behind a squeak that sounds like a finger rubbing clean glass if the parts are reassembled damp. Dry plastic parts properly and that outcome is uncommon.
5. Remove Residue and Let Everything Dry
With the shell apart, clean the membrane and contacts rather than soaking them. Brush 99% isopropyl alcohol across the rubber membrane with the toothbrush, working lightly so the bristles do not abrade the carbon dots, then wipe it with a cotton swab until the swab comes away clean.
Remove dried residue from the button well with the swab and the toothpick together: alcohol to soften it, toothpick to lift it. Flooding a switch is the classic way to turn a sticky button into a dead one, so keep each pass damp rather than wet and let the swab do the work in two or three rounds.
Blow the whole assembly with compressed air to clear loosened material and solvent out of crevices, and hold the controller at an angle so drainage runs out of the openings rather than across the board. Reconnect every cable and put the shells back together finger-tight before you tighten any screw. You should be able to press each button and feel the cap travel freely before the controller goes back on the desk.
Give it a full night before you power it on. Surface work needs 5 to 10 minutes; a full teardown after a wash needs 12 to 24 hours. Then reconnect, test every button in a game, and check whether the input registers the first press.
Common Mistakes
Pouring alcohol directly into the controller. Spraying is not cleaning, it is soaking. Liquid runs under the membrane and across contacts that were never the problem. Dampen the swab in a cup instead.
Using a dripping or soaking swab. You want the crevice damp, not flooded. Squeeze the swab until almost nothing comes out of it.
Forcing the button. If the cap will not come back, residue or a bent membrane is holding it. Pulling harder chips the cap and can snap the plastic post underneath, which ends the conversation with a repair, not a clean.
Poking with metal tools. A needle or a small screwdriver in a live controller will short contacts and strip screw heads. Wooden toothpicks and plastic picks only.
Ignoring the battery. Remove it before liquid work and never put it back before everything is dry. A damp battery is the one mistake that ends a controller permanently.
Brake cleaner, clutch cleaner, cooking oil, standard WD-40, or household glass cleaner. Brake and clutch cleaners contain aggressive solvents such as perchloroethylene, methylene chloride, acetone and toluene that attack controller plastics and eat rubber membranes. Standard WD-40 leaves an oily film that collects more dust than it removes. Cooking oil does the same thing and never evaporates. Glass cleaner is mostly water and leaves the film you started with. Electrical contact cleaner has a legitimate use, but on metal-to-metal ports rather than plastic caps pressing on rubber.
Using 70% alcohol wipes. They work, but the added water and the leave-on residue in most disinfectant wipes means you often need a second pass. Use them only if it is all you have.
Powering on while it still feels wet. Alcohol feels dry before it has gone. Give it the full dry window every time.
One habit is worth stealing outright: wash your hands before a long session. Most controller grime is what your hands carry to it, and a technician friend put it best years ago, that clean hands and a compressed-air blowout every couple of months keep stickiness from ever building up.
Frequently Asked Questions
Is isopropyl alcohol safe for controllers?
Yes, used correctly and sparingly. Isopropyl alcohol is an evaporating, electronics-safe solvent, and 90-99% concentration is what electronics technicians use. Dampen a cotton swab and squeeze out the excess, then work it only into button crevices and avoid glossy plastics, the touchpad and any label. Never spray the controller directly, and always remove the batteries first.
Can I use 91% isopropyl alcohol to clean my Xbox controller?
91% works well. It is slightly more dilute than 99% so it lingers a touch longer, which is helpful for loosening dried grime, and the water content is low enough not to leave a film once it evaporates. Apply it with a damp cotton swab around the button edges, press the button repeatedly, and let the controller dry 5 to 10 minutes before you power it back on.
What is the best way to clean sticky controller buttons?
Dampen a cotton swab with 90-99% isopropyl alcohol, squeeze out the excess, run it around the edges of the button, then press the button in and out a dozen times so the solvent reaches the residue trapped under the plastic cap. Pick out loose debris with a wooden toothpick and let the controller dry for 5 to 10 minutes. Escalate to a full teardown only if the button still sticks.
Why do my controller buttons get sticky?
Because the gap between the button cap and the shell collects sweat, skin oils, dust and drink residue. Under the cap sits a rubber membrane with a conductive carbon dot that has to bridge two metal contacts for the button to register. A gummy film on that dot stops it conducting cleanly, and the same film physically glues the cap to its recess, which is why buttons feel tacky and occasionally register as stuck down.
Can you clean sticky buttons without rubbing alcohol?
Yes, for mild dust and grime. Blown compressed air, a soft toothbrush worked around the button seam and a wooden toothpick for packed debris often fix a button that only feels dusty. A barely damp cloth with a drop of mild dish soap also helps on plastic surfaces. None of these dissolve a sticky film as reliably as isopropyl, so expect to reach for the alcohol once the residue is oily or sugary.
Should I clean the controller or replace it?
Clean it first, because cleaning fixes the large majority of sticky cases in minutes. Stop and look at replacement when the button stays physically depressed, when it never registers a press even after a membrane clean, or when stickiness returns within days of a proper clean. A controller that arrived sticky from the box is a warranty matter, so contact the manufacturer before opening it and voiding your coverage.
Conclusion
Start dry and finish wet, in that order. Blow out the crevices, brush the seams, pick out the debris, then go over the sticky button with a barely damp cotton swab of 90-99% isopropyl alcohol and press it repeatedly while the solvent is still wet. Wait the full 5 to 10 minutes before powering on, and you will very likely have a controller that feels like new again.
Stop cleaning when the membrane has been cleaned and the button still refuses to travel or to register. At that point the cause is a stretched or damaged membrane, a bent cap post, or genuine stick drift, and no amount of solvent fixes any of those. If the controller was already sticky before you owned it, treat it as a defect and go through the manufacturer’s warranty rather than opening it yourself. Once everything is bone dry, test it in a game and pay attention to whether that first press registers every time.