A good base layout falls out of a plan you make before you place a single wall: pick one job for the base, choose a spot that serves that job, divide the build into zones, connect the zones so you are not walking everywhere, and add defense last so it never blocks the next expansion. The whole thing takes about twenty minutes of thinking, and it saves you the dozens of hours most players lose to a base that no longer works.
Here is how to plan a base layout in survival games in six steps, whether you are raising a starter shack in Minecraft or running a fortified clan compound. The principles travel; the numbers change with the game.
Table of Contents
- What You Need Before You Build
- Step-by-Step: How to Plan a Base Layout in Survival Games
- 1. Choose the Base’s Main Function
- 2. Survey the Location and Map
- 3. Create Zones for Core Activities
- 4. Plan Movement and Resource Flow
- 5. Add Defense Without Blocking Expansion
- 6. Test the Layout Before Building at Full Scale
- Common Mistakes and Better Fixes
- Frequently Asked Questions
- What is the best way to plan a base layout in survival games?
- Should I build my survival-game base near resources or in a safe location?
- How do I stop enemies from breaking into my base?
- Where should I put farms and water collectors in a survival-game base?
- When should I expand my base in a survival game?
- How do different survival games change base-layout planning?
- Conclusion
What You Need Before You Build
Most bad bases are not badly built. They were started before anyone worked out what the base was for.
- A main function. Safe storage, crafting, farming, defense, fast travel or a long-term settlement. Pick one and design around it.
- A count of your starting materials. What you can realistically carry on your first trip decides how big the first version can be. Three trips of logs is a starter base, not a manor.
- A read on the terrain. Slopes, cliffs, water, choke points and flat ground decide whether walls will help or fight you.
- A list of nearby threats. Where enemies spawn, where raids come from, which direction is exposed.
- The facilities your tech tier actually needs. A campfire and a workbench at first, not a full production line you cannot power yet.
- Two directions of open ground. Space to grow into. One direction is a dead end.
Ten minutes gathering that information saves a rebuild. I have watched a player spend three in-game days walling a spot they later abandoned because there was nowhere to put a farm.
Step-by-Step: How to Plan a Base Layout in Survival Games
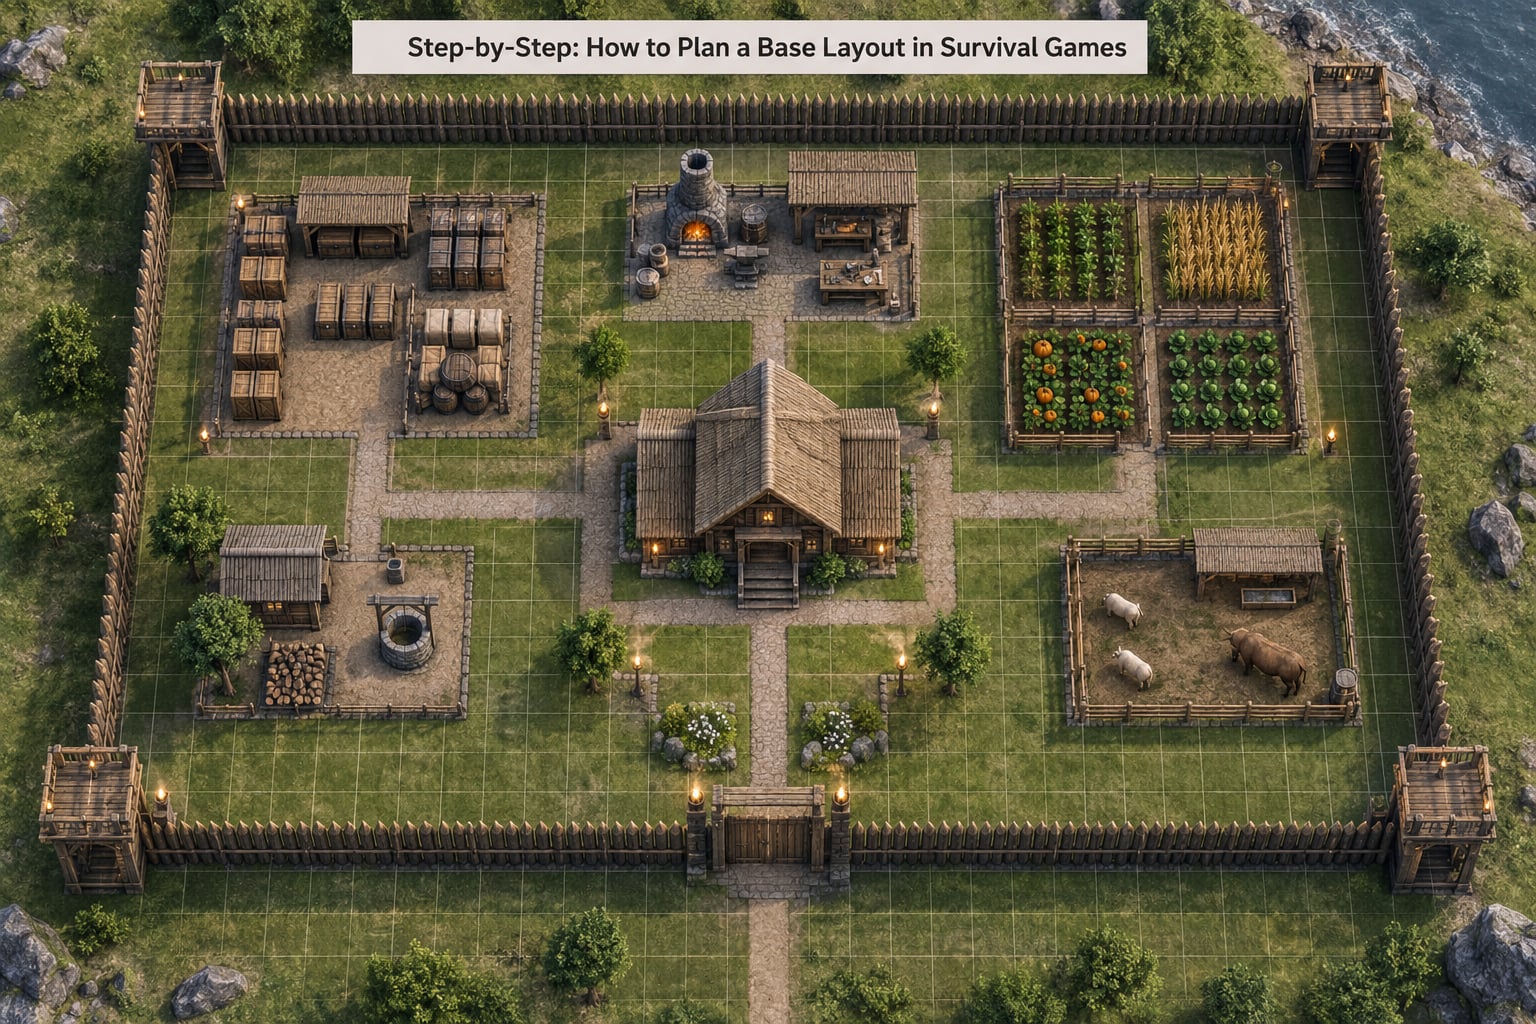
Work through these in order. Each one assumes the last is settled, and each has a quick check that tells you whether it worked.
1. Choose the Base’s Main Function
Decide what this base is for before you decide where it goes. A storage base wants to be hidden, walled and boring on the outside. A crafting base wants flat ground, power access and short walks. A farming base wants sunlight, water and open soil. A forward outpost wants to be small, fast to pack up and near the action.
Most players pick a balanced settlement, which sounds sensible and usually ends as a large empty box with one forge in a corner. Pick two functions. Storage plus farming, or crafting plus defense. Two is a layout you can actually serve.
Check: say your base’s job out loud in one sentence. If you need more than one sentence, you have not decided yet.
2. Survey the Location and Map
Walk the ground before you build on it. Look at slope, water access, where the resources are, where enemies spawn, and where you would run from if something got in.
Three things matter most. First, natural cover: a cliff, a river, a ravine or a narrow gap between rocks beats any wall you can afford on day one. Second, resource distance: close enough that wood, stone and water are a short trip, far enough that you are not fighting for the same nodes as everyone else. Third, buildable space: flat ground for rows of chests and a slope or cliff face for a defended back wall.
Stand where an attacker would approach from and look at your spot. If you can see your front door from three directions, that is a problem you solve now or never.
Check: every critical resource, water and your first building material should be within a minute’s walk of the build site.
3. Create Zones for Core Activities
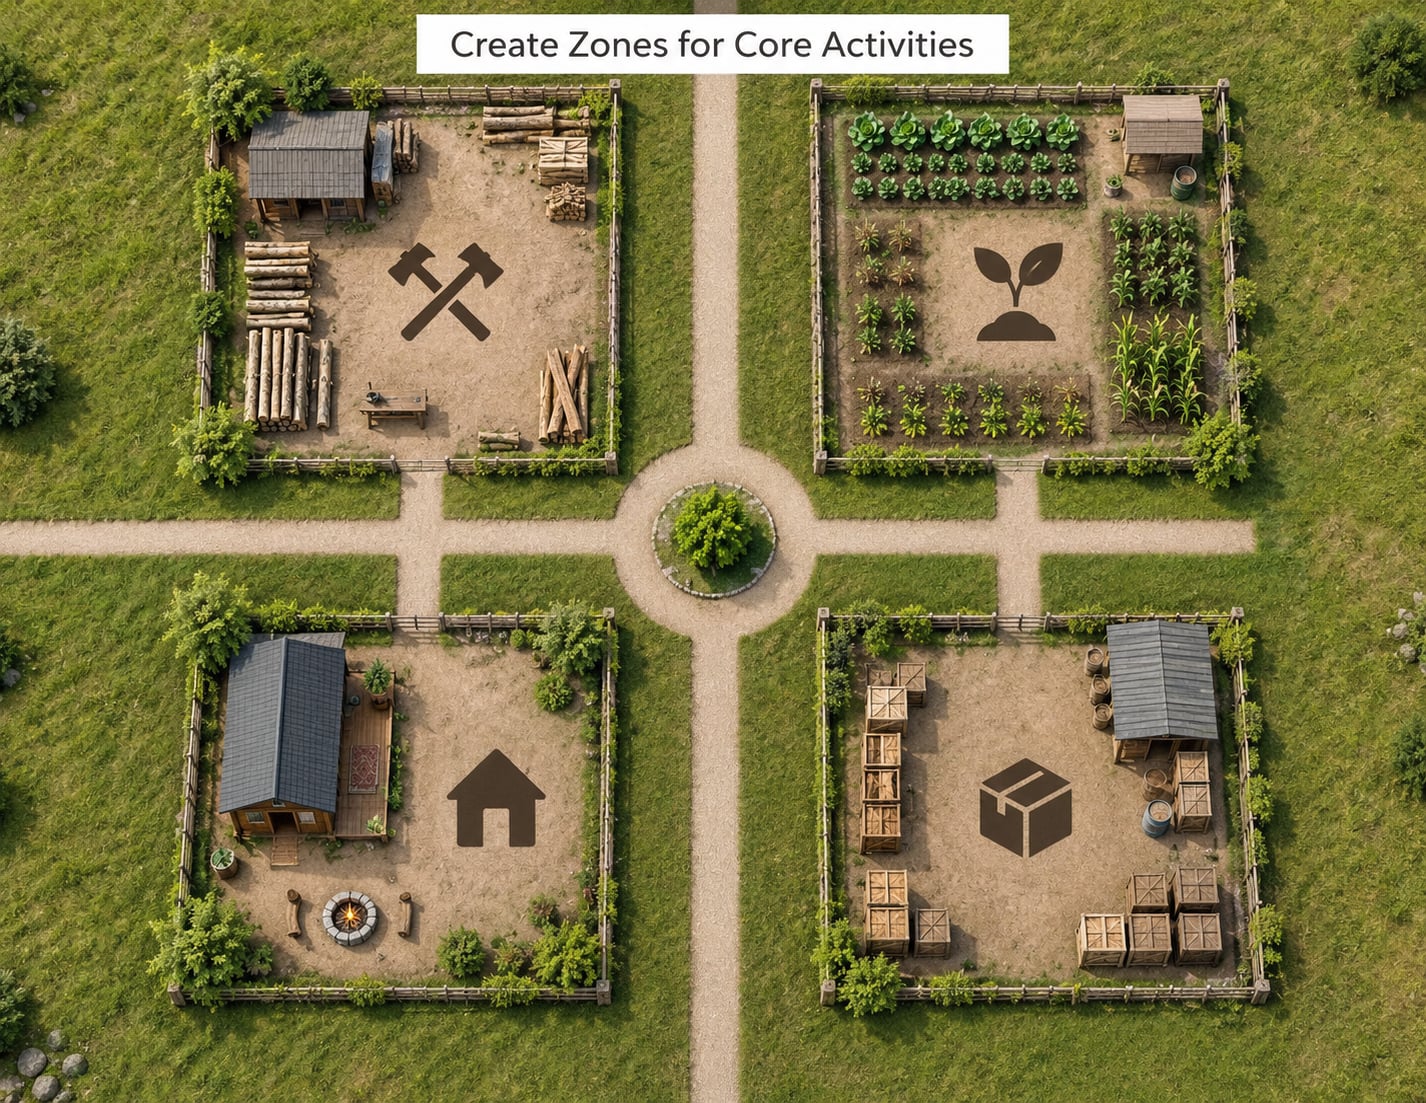
Zoning means every activity gets its own area, and every area touches the areas it depends on. Six zones cover most bases:
- Shelter — sleeping, respawning, healing
- Storage — chests, sorted and labelled
- Crafting — benches, furnaces, smelters, workbenches
- Food — crops, cooking, water collection
- Power — generators, fuel, wire or pipe runs
- Defense — traps, turrets, gates, the kill zone
At your current tier you need two or three of those, not six. Zones earn their place as technology unlocks, and a base with three working zones beats one with six empty rooms.
Inside storage, sort by use rather than by type. One chest for building materials, one for food, one for tools and gear, one personal chest that nobody else touches. In multiplayer that last one prevents more arguments than any defense layout.
Check: every zone has a straight path to at least two others. If one is only reachable through another, move it.
4. Plan Movement and Resource Flow
This is where good bases separate from bad ones. The useful rule is simple: if walking between two tasks takes more than about a minute, the layout is costing you time every single day.
Work out the real order of your tasks. You collect wood and stone, you bring it home, you store it, you craft at a bench, you cook, you feed yourself or your animals, you repair gear. Put those stops in that sequence rather than wherever they happened to land. Storage goes between the entrance and crafting, not in a separate corner. Water collection touches the food zone. Power runs to the stations that need it, so keep those along one wall to shorten the cable or pipe.
Go vertical before you go wide. Stacked floors with ladders cut walking distance more than any sprawling single-floor design, and a basement protects your best loot in most games. Wide builds cost more material, take longer to light, and leave you more doors to defend.
Keep stored valuables inside the defended footprint, not in an annex. A separate shed is a separate problem.
Check: time your round trip from front door to storage to bench and back. Over a minute, tighten the layout.
5. Add Defense Without Blocking Expansion
Build defenses in layers, cheapest and most natural first, so the expensive stuff never ends up in the wrong place.
- Terrain. Build into a cliff, behind water, or across a narrow gap. Free, and it never falls to a ram.
- Traps and lighting. Along the approach route. In many games, light also suppresses spawns, so lit ground near the base does double duty.
- Turrets and kill zones. Positioned so enemies walk a path you cover rather than a path you guard.
- Walls and gates. Last, thickest where raids actually come from.
- An escape route. Two ways out, always. A trap with one door is a coffin.
Leave gaps on purpose. A ring of wall with a wide strip of buildable ground behind it is a base you cannot extend; that strip is your expansion seam, and you should know where it is before you wall it in.
Against player raiders, single-thickness walls are decoration. Layer them, fill the gaps between layers with structural pieces, and put your real storage at the centre so an intruder has to break through three shells before finding anything worth taking.
Check: walk the attack route yourself. If there is a stretch you would not want to stand in, fix the wall before you furnish the room behind it.
6. Test the Layout Before Building at Full Scale
Almost every game has a free planning mode: a blueprint screen, a creative fly mode, a map, even pen and paper. Use it.
Place your planned zones as rough blocks, then walk the routes you intend to walk. Time the loop from door to storage to bench to kitchen and back. Check the sightlines from outside the base so you know what an attacker sees. Look at the gaps you left for expansion and ask whether the next building you unlock still fits.
Then adjust. Moving a marker costs ten seconds. Moving a wall in survival costs an afternoon.
Check: you can describe the finished base’s floor plan in three sentences and know where every zone sits. If not, keep planning.
Common Mistakes and Better Fixes
Building many disconnected rooms. Every room you add costs a wall, a door and a trip. Fix: connect everything with a main corridor first, and hang new rooms off that line.
Adding defenses too late. A finished base with a wall around it is expensive to fence. Fix: decide the entry point in step two and keep it unbuilt until you have the materials.
Ignoring farms and water. Food is a timer on every run. Fix: put a small food and water zone inside the walls from the start, even if it is two crops and one collector. Expand it later in the same spot.
Overcrowding the crafting area. Benches on top of each other means someone in a party stands around waiting. Fix: leave a walkable aisle between stations, and duplicate the station that gets used most.
Expanding without a plan. Spreading out in four directions at once means four weak points and long walks. Fix: pick one expansion direction, usually the one with flat ground and room for a farm, and leave the others open as fallbacks.
Treating the starter base as permanent. The sunk-cost version is the most common one. A starter base is scaffolding. Fix: give it a condition for retirement — when you unlock two new crafting tiers, when your storage overflows, or when it stops being safe — and start the real base before that happens, not after.
A note on fixing a base you already own: you do not have to tear it down. Add the missing zone where it fits, move the one thing that breaks your walking loop, and wall the direction you are ignoring. Most messy bases need one change and a wall, not a rebuild.
On console, precision is the constraint. Build in smaller chunks with a snap grid, use the rotate control to align pieces before placing rather than after, and keep the layout simple enough that you can place a wall piece without fighting the camera. Wide, intricate patterns are much harder on a controller than they look in a video.
Frequently Asked Questions
What is the best way to plan a base layout in survival games?
Start with one sentence naming the base’s main job, then pick a location that serves it: natural cover, resources and water within a minute’s walk, and room to grow. Next sketch four zones, connect them with short paths, and test the walk in build or blueprint mode before placing real materials. Add defense last so walls never block your next expansion.
Should I build my survival-game base near resources or in a safe location?
Both, but weight them differently by game stage. Early on, stay near resources and water because a long trip home costs you more time than a raid costs you materials. Once you have storage and a few defenses, you can afford a safer, more hidden site with a short resource run. A good middle ground hides the base well while keeping wood, stone and water one minute away.
How do I stop enemies from breaking into my base?
Layer your defenses instead of stacking one strong wall. Start with terrain such as cliffs or water, add traps and lighting along the approach, position turrets to cover a path enemies must walk, then build walls and gates last and thickest where raids come from. Always keep two escape routes inside your own footprint so you are never trapped, and put your best loot deep inside.
Where should I put farms and water collectors in a survival-game base?
Inside the walls, next to the cooking or storage zone, and close to a power source if irrigation or processing needs power. Small plots work early because they can sit beside the main corridor without adding much to the build. Leave room for a larger version later by picking a sunny spot with access to a water source rather than the first flat patch you find.
When should I expand my base in a survival game?
Expand when you run out of room for a function you actually use, when storage no longer fits in one sorted area, or when you unlock a tier that adds stations you cannot place. Do not expand because you have spare materials. Pick one direction with flat ground, keep the rest open, and treat your starter base as temporary once the second crafting tier lands.
How do different survival games change base-layout planning?
The method stays the same, but the weighting shifts. Minecraft rewards compact, vertical, redstone-friendly builds. Valheim rewards stone halls with separate build, cook and storage wings. Ark adds irrigation, power lines and taming pens that need real space. Subnautica is mostly underwater, so depth and escape routes matter more than walls. 7 Days to Die makes defense and horde approach angles the priority.
Conclusion
Start with one function, sketch four zones around it, and walk the routes before you build anything. If you do only those three things tonight, the rest of this guide is refinement.