To stop a gaming PC from overheating, work through three causes in order: dust packed into the fans and heatsink fins, dried-out thermal paste, and a case that does not move enough air. Those three account for most cases, and each fix takes minutes with basic tools. Most builds are back to normal temps inside an evening.
The rest of this guide follows the same order a technician would use. Check the temperatures first so you know what you are dealing with, work the cheap fixes before opening the case, and only consider new hardware once the free stuff is done.
One warning before you start: unplug the PC from the wall and hold the power button for a few seconds before you touch anything inside it. Capacitors inside the case hold a charge, and fans spinning up unexpectedly is how people hurt their fingers.
Table of Contents
- What You Need
- Step-by-Step
- 1. Confirm the overheating symptoms and record temperatures
- 2. Check that the PC has enough ventilation
- 3. Clean dust from fans, filters, heatsinks, and vents
- 4. Improve the case airflow
- 5. Set fan curves and sensible performance limits
- 6. Check CPU and GPU cooler installation
- 7. Replace dried-out or unsuitable thermal paste
- 8. Decide whether the cooler or hardware needs upgrading
- Common Mistakes
- Frequently Asked Questions
- What temperature is too high for a gaming PC?
- Is it normal for a gaming PC to get hot?
- Should I replace thermal paste if my PC overheats?
- Does cleaning a gaming PC with compressed air make it colder?
- Can a laptop overheat even when its fans are working?
- When should I stop using a PC that is overheating?
- Start With the Cheapest Fix First
What You Need
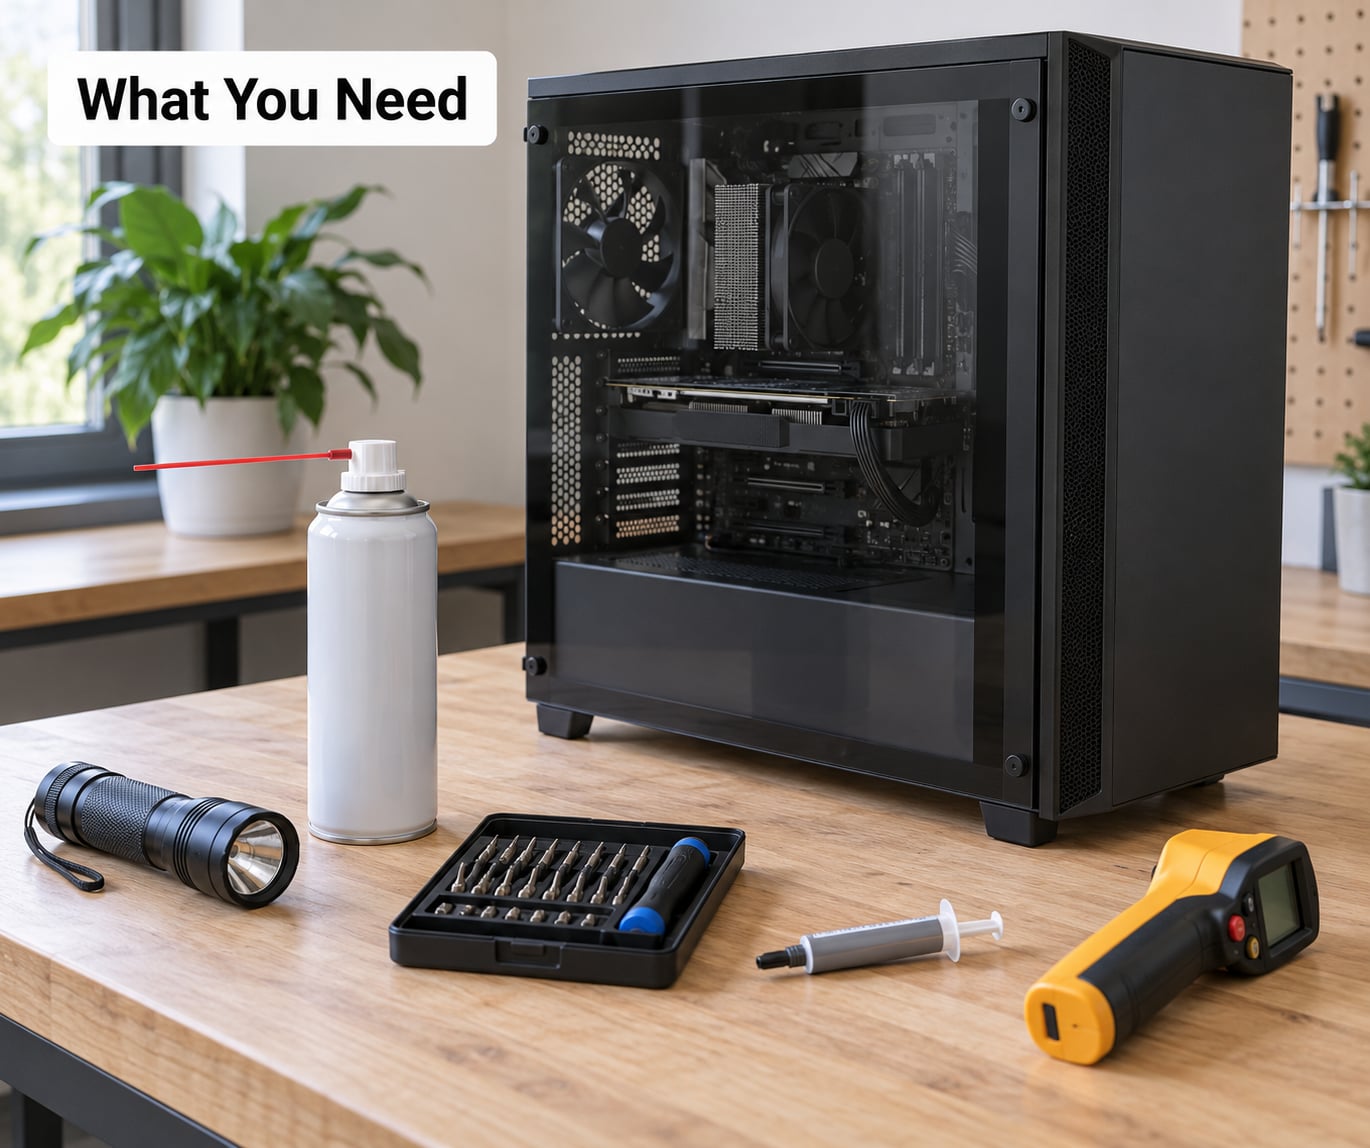
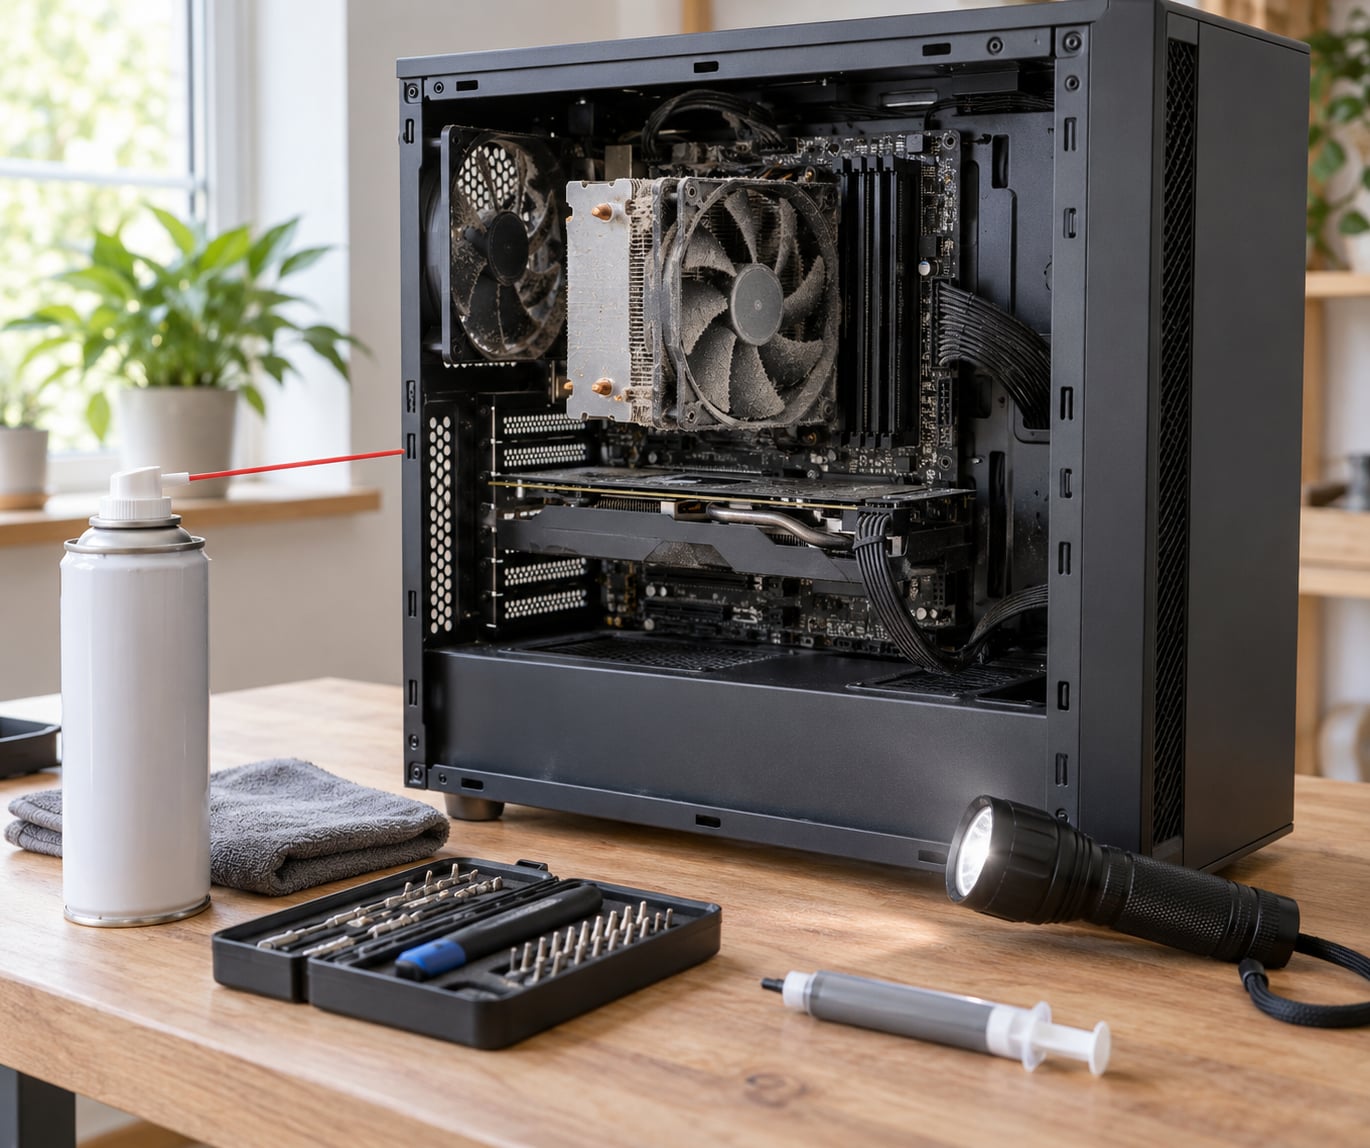
You do not need much. A flashlight, a can of compressed air, a screwdriver that fits your case screws, and a tube of thermal paste cover the physical work.
- A flashlight or phone torch. Dust hides in dark corners and in the shadow behind the motherboard tray.
- Compressed air. Short bursts, held a few inches away, so the propellant does not spin a fan to high speed.
- A screwdriver set. Most cases use T6, T8 and M3 screws, so a precision kit with bits saves time.
- Thermal paste. Only needed if you are opening the cooler anyway. Most tubes last years.
- An infrared thermometer or a temperature probe, useful for spotting a hot exhaust vent from outside the case.
- Monitoring software. HWMonitor or HWiNFO for reading CPU and GPU temperatures, MSI Afterburner for graphics card fan curves, and the vendor control panel that shipped with your motherboard or laptop.
Have a soft brush or an old makeup brush for the heatsink fins. Compressed air alone tends to push dust deeper into the fin stack rather than out of it.
Step-by-Step
The sequence below is deliberately ordered cheapest first. Every step tells you what to do and how to tell whether it worked, so you can stop as soon as the numbers come back under control.
1. Confirm the overheating symptoms and record temperatures
Start by measuring, not guessing. Install HWMonitor or HWiNFO, leave it running in the background, and play the game where you notice the problem. That game matters, because heavy scenes often trigger throttling while your average temperature across a session looks fine.
Log four numbers: CPU temperature at idle after two minutes of no load, CPU temperature after ten minutes of gaming, GPU temperature under the same load, and any frame drops or stutter you notice. Write them down. Without a before figure you cannot tell whether a fix helped.
| Reading | Comfortable under load | Worth investigating | Throttling or damage risk |
|---|---|---|---|
| CPU, gaming load | Under 85C (185F) | 85-90C (185-194F) | Over 90C (194F) |
| GPU, gaming load | Under 80C (176F) | 80-83C (176-181F) | Over 83C (181F) |
| CPU, idle | 30-50C (86-122F) | 50-60C (122-140F) | Over 60C (140F) at idle |
| GPU, idle | 30-45C (86-113F) | 45-55C (113-131F) | Over 55C (131F) at idle |
These are the widely used desktop thresholds rather than hard lines from a manufacturer. Modern chips are designed to run near their limits under load, so 85C on a Ryzen 9 during a ray-traced scene is not an emergency. Hitting 95C (203F) repeatedly is a reason to fix something, and any shutdown, black screen or burnt smell means stop now rather than troubleshoot later.
If you are not sure which part is at fault, use the symptoms:
| What you notice | Most likely cause | Start at |
|---|---|---|
| Hot exhaust only near the graphics card, good frame rates | Dust in GPU fans and fins, or the card’s own cooler | Step 3, then step 6 |
| Hot exhaust near the CPU cooler, whole system slows in long sessions | Heatsink fins clogged or dried thermal paste | Step 3, then step 7 |
| Both CPU and GPU hot at the same time | Case airflow or room temperature | Step 2 and step 4 |
| Idle temperature high, but load temperature normal | Fan curve too aggressive, or a fan running at full speed constantly | Step 5 |
| Stutter in one specific game, temperatures look fine on average | Short throttling spike in a heavy scene, or a limit enabled somewhere in software | Step 5, check the maximum boost or power limit |
| Hot case but cool components | Case itself is warm, which is normal; the metal is just conducting heat out | Nothing. Check the sensors, not the chassis |
2. Check that the PC has enough ventilation
Move the PC off carpet and away from a wall or cabinet that blocks its vents, and leave several inches of clearance at every side. Many cases pull air in through the front and bottom and push it out the back and top, so pushing the tower against a wall chokes the intake.
Check the room too. A PC in a hot room has less margin for cooling, and running your PC next to a space heater or in direct afternoon sun is asking for trouble. If you suspect ambient heat, point an infrared thermometer at the case near the exhaust and compare it with the room reading.
Any blinds, cardboard box or cable bundle sitting over a vent is worth moving. This costs nothing and fixes more cases than people expect.
3. Clean dust from fans, filters, heatsinks, and vents
Unplug the PC, switch it off at the wall, hold the power button to discharge it, and only then remove the side panel. Take a photo of the cable layout before you disconnect anything, especially with an all-in-one liquid cooler where the pump and radiator are separate pieces.
Work through it in this order:
- Unplug the fans first so a stray burst of compressed air cannot spin them.
- Blow dust out of the case exhaust and intake filters. Many cases have removable filters on the front and bottom that slide out and rinse or brush.
- Hold each fan blade still with a finger and blow the dust off the blades and the frame. Holding the blade prevents bearing damage and stops the fan from generating a voltage back into the motherboard header.
- Work through the heatsink fins with the soft brush, pushing dust out sideways rather than deeper in. Fin stacks on tower coolers and on the side of most graphics cards turn into a solid grey mat.
- Check the CPU cooler underside and the GPU fans where dust packs in tight and is invisible from outside.
Never use a household vacuum. Static discharge from a vacuum can kill a component instantly, and a vacuum heats motors and can pull dust out of a filter and blow it back across the case. Compressed air and a brush only.
Users cleaning after a couple of dusty years typically see a drop of 5-15C on the CPU or GPU once the fins are clear again, especially if the machine has never been opened since it was built.
4. Improve the case airflow
The rule most builders agree on is simple: more filtered air in at the front and bottom, more air out at the rear and top. Two front intake fans plus one rear exhaust fan is the near-universal starting point for a mid-tower, and it makes positive pressure, where the case holds slightly more air in than it pushes out.
Negative pressure setups with only exhaust fans do work, but they pull unfiltered air through every gap and straight across the components, and they are louder because the fans run harder to make up the difference. Positive pressure with intake filters is quieter and keeps dust out in the first place.
Remove anything that blocks the path: drive cages you no longer use, an unused hard drive bay cover, a cable bundle zip-tied across the front intake, or a hard drive sitting directly in front of the graphics card. Fold the power supply cables behind the motherboard tray and out of the airflow path rather than letting them bulge into the case.
After that, run the 30-second test. Leave the side panel off, start the same game you logged earlier, and watch the CPU and GPU temperatures in HWMonitor. If a large fan near the CPU has been mounted as an exhaust fan, it pulls air across the tower cooler. Leave the panel off to test, then decide whether the case needs a real fan change rather than continuing to game with the panel open. It is a diagnostic, not a fix.
5. Set fan curves and sensible performance limits
A fan curve tells each fan what speed to run at a given temperature. Out of the box, many boards drive fans aggressively, so fans spin up and scream for small temperature changes, which is the complaint in most fan curve threads. Shaping the curve quieter and letting the temperatures ride a little higher cuts noise without any hardware change.
Where the setting lives depends on the hardware:
- Windows: the manufacturer control panel installed with your motherboard, or the utility that came with your laptop. Graphics card fan curves live in MSI Afterburner or NVIDIA App for an NVIDIA card, and in AMD Adrenalin for an AMD card.
- BIOS or UEFI: press the delete or F key at boot to enter setup, then look under Hardware Monitor, Fan Control or CPU Fan Configuration. Names differ between board makers, so read the labels rather than following one fixed menu path.
- Within a gaming application: most titles expose a frame rate limit. Capping your frame rate at a rate your system can hold steadily lowers heat and removes stutter from heat spikes, and it is the cheapest change on this entire list.
While you are in there, check the power limit or maximum boost setting. Several popular tuning utilities enable an overclock automatically and leave it running, and users often do not know how to revert it. If the machine is slower and hotter than it used to be with the same settings, that is where I look first.
Do not raise the thermal ceiling to hide the problem. Raising the TjMax limit just lets the chip run closer to its maximum before slowing down.
6. Check CPU and GPU cooler installation
Take the cooler off and look at the contact surface. Fresh paste should look like an even spread across the whole plate or the whole heat spreader, not a small blob in the middle with bare metal showing around it. Patchy coverage on an older paste job is a common reason people repaste and then find no change, because they had already done it badly once.
With the cooler mounted, tighten the mounting screws in a criss-cross pattern, a bit at a time. Over-tightening bends the heat spreader on some processors and drives the temperature up. If you have to lean your whole body weight on the screwdriver, stop. Firm hand pressure is enough.
Check orientation while you are in there. An all-in-one cooler belongs with the radiator at the top or front of the case and the pump block on the CPU, and tubing that bends sharply right at the pump adds noise. Hoses routed down to the bottom radiator can also pull in dust from the floor.
On the graphics card, spin each fan by hand. A fan that does not rotate freely, or one that rattles, is a bearing on its way out and it will not push air well. Fins on the card edge are usually a plastic shroud away, and dust there starves the card of airflow while the fans spin up to maximum trying to compensate.
7. Replace dried-out or unsuitable thermal paste
Thermal paste is a metal-based compound that fills microscopic gaps between the chip and the cooler. It starts slightly wet so it spreads under mounting pressure, then dries out over years. Dried paste conducts heat like a poor conductor should, and the CPU climbs toward its limit even though nothing is physically broken.
Repasting makes sense when the machine is more than two years old, has never been opened, or has been moved a lot. Users typically report a drop of 10-15C from a fresh, correctly applied layer, occasionally more on a chip that was badly mounted to begin with.
Follow the instructions for your exact cooler rather than any general guide. Paste amount is the part people get wrong, and each cooler type has its own rule: a pea-sized dot for most Intel chips, a very thin line for many Ryzen processors, and specific patterns for some large contact plates and for bare dies. Use non-conductive paste for CPUs and follow the pad thickness your graphics card or M.2 drive came with, because the wrong thickness prevents the heatsink from ever touching the chip.
This is the point to stop if you have never removed a cooler before. You can damage the processor or the motherboard socket, and a bent socket pin is not repairable at home. Find a local repair shop, ask a friend who has built PCs, or watch a video for your exact cooler model first. If the cooler is under warranty or the paste came pre-applied with a warranty seal, check before you touch it.
8. Decide whether the cooler or hardware needs upgrading
If you have cleaned the fins, restored airflow, shaped the fan curve and repasted, and the temperatures are still riding the limit, the problem is capacity rather than blockage. That is the only point where new hardware is the right answer.
Match the cooler to the chip, roughly by tier. A Ryzen 5 or Core i5 usually sits fine on the cooler that shipped with it, though a small tower air cooler adds headroom for long sessions. A Ryzen 7 or Core i7 wants a proper tower air cooler or a 240mm all-in-one. A Ryzen 9 or Core i9 wants a large tower cooler or a 280mm to 360mm all-in-one, and those chips also generate enough heat that an undervolt often beats a bigger cooler.
If you upgraded the CPU or graphics card and left the cooler alone, that is the likely cause of a new problem. The card that handled a previous processor is not automatically enough for the one you just fitted.
Before buying anything, try software. A voltage undervolt on an Intel chip, or Curve Optimizer on a Ryzen, reduces heat without any power loss and needs no hardware at all. Users report roughly 10C off a graphics card temperature after dropping 0.3V, which on some cards removes the fan noise entirely. Apply offsets in small steps, test for stability, and back out immediately if anything crashes or looks wrong.
Gaming laptops need their own list, because the fixes are different. Clean the exhaust vents and internal heatsink fins, replace the factory thermal putty or paste on the CPU and GPU dies if you can find a technician who will do it, cap the frame rate, and use a cooling pad to lift the rear feet off the desk. Undervolting works there too, but the tighter cooling and shared heat pipes mean laptops throttle sooner than a desktop with the same chips.
Common Mistakes
Most of the damage people cause while trying to fix overheating comes from a handful of repeated errors:
- Blowing dust further into the case. Compressed air aimed straight into a clogged fin stack pushes dust deeper. Hold the can at an angle, brush the dust out sideways first, and take short bursts.
- Using a vacuum near the components. Static from a household vacuum can destroy a graphics card instantly. Brush and compressed air only.
- Over-tightening the cooler. Cranking the mounting screws damages the thread and can bend the heat spreader, which pushes temperatures up rather than down. Tighten in a criss-cross pattern until firm.
- Applying thermal paste without reading the instructions. Too much paste insulates, and some coolers with a large contact plate need a specific pattern. Check the cooler type before you open the tube.
- Running fans while cleaning. A fan spun up by compressed air can generate voltage back into the header and damage it. Hold the blades or unplug the fan first.
- Changing five settings at once. Adjusting the fan curve, the power limit, the frame rate cap and an overclock together means you cannot tell which one helped, or which one caused a crash. One change, one test.
- Raising the temperature ceiling instead of cooling. Raising TjMax or the power limit hides the symptom and gives you less headroom before the chip slows down.
- Leaving the side panel open and calling it fixed. It is a useful 30-second diagnostic, but it lets unfiltered air in and needs a real airflow fix afterward.
Frequently Asked Questions
What temperature is too high for a gaming PC?
For a desktop CPU, staying under 85C (185F) under gaming load is a sensible target, and anything over 90C (194F) means the chip is hitting its throttle point or close to it. For a graphics card, aim under 80C (176F), with anything over 83C (181F) worth investigating. These are comfort targets rather than safety limits, since modern chips are built to run near their maximum under load.
Is it normal for a gaming PC to get hot?
Yes. A warm case and loud fans under load are normal, and the metal side panels are meant to feel warm because heat is leaving the case through them. What matters is the temperature reported for the CPU and GPU, not how hot the chassis feels. Idle temperatures above 60C (140F) for the CPU, or above 55C (131F) for the GPU, are the readings worth acting on.
Should I replace thermal paste if my PC overheats?
Usually, if the machine is more than two years old, has never been opened, or still throttles after a proper dust clean and airflow check. Users typically see a drop of 10-15C from a fresh layer applied correctly. If the cooler is still under warranty or came with a warranty seal over the paste, check with the manufacturer first, and follow the instructions for your exact cooler rather than any general guide.
Does cleaning a gaming PC with compressed air make it colder?
It often does, because clogged heatsink fins and packed fan blades reduce airflow. Users cleaning a dusty two-year-old build commonly report a drop of 5-15C on the CPU or GPU. Hold each fan blade still while you clean it, brush the fin stacks out sideways, unplug the fans first, and never use a household vacuum, since static discharge from one can destroy a component instantly.
Can a laptop overheat even when its fans are working?
Yes, and it is usually faster than a desktop. Laptop CPU and GPU dies share heat pipes, cooling is much smaller, and the factory paste or putty dries out quickly. Clean the exhaust vents and internal heatsink fins, cap the frame rate, use a cooling pad to raise the rear feet off the desk, and consider a technician for repasting the dies. Fine dust on the intake side matters more than the noise from the fans.
When should I stop using a PC that is overheating?
Stop immediately if it shuts down, reboots on its own, shows a burnt or fishy smell, or has any visibly discoloured or melted part around the cooler or power supply. Those are signs of a hardware failure rather than a cooling problem. A PC that throttles but keeps running is not in danger of dying that day, but it is losing performance and should be fixed in the same week.
Start With the Cheapest Fix First
If you only do one thing tonight, open the case, unplug the fans, brush out the heatsink fins and blow out the dust, then watch the same game in HWMonitor. That single step fixes more overheating complaints than anything else on this list and costs almost nothing.
If the numbers are still high after that, work outward in order: airflow and placement, then the fan curve and frame rate cap, then the cooler mount and the thermal paste. Save the shopping trip until the free fixes are done. In 2026, a build that has never been opened since it was assembled is the most likely to need all three of the main fixes, and the whole job is a weekend afternoon rather than a new component.