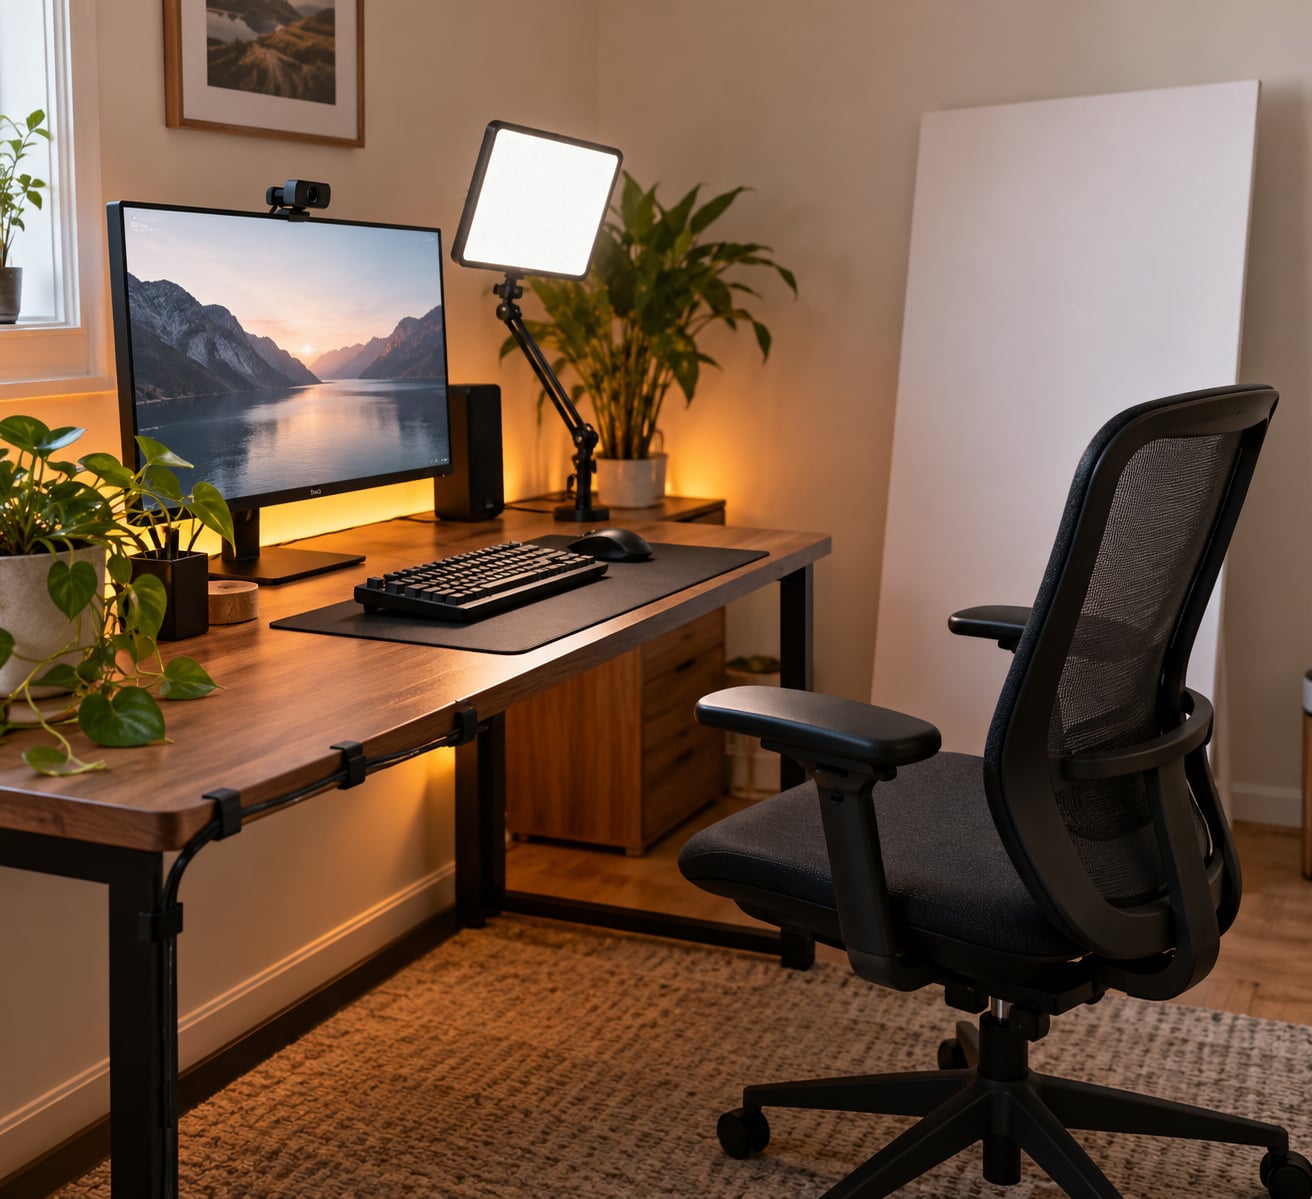
The best stream lighting setup for a small room is three layers: one bi-color LED panel as your key light, placed 45 to 60 degrees off your camera axis, a white foam board or the opposite wall bouncing light back as fill, and an LED strip or small panel behind and above you to separate you from the background. No light stands, no ceiling fixture, nothing bigger than a shoebox sitting on your desk.
Small rooms break most lighting advice because the advice assumes floor space and empty walls. You have a shallow desk, a wall about 4 feet behind your chair, and a camera that sees everything. What that means practically is that light bounces off nearby surfaces constantly, shadows fall harder because there is nothing to soften them, and whatever is behind you is permanently in frame.
The whole build takes about half an hour. Calibration takes another ten minutes, and it is the part people skip.
Table of Contents
- What You Need
- Step-by-Step
- How to Position Your Key Light
- How to Add Soft Fill Light Without Flattening Your Face
- How to Light the Background in a Small Room
- How to Test and Fine-Tune the Image
- Common Mistakes
- Frequently Asked Questions
- What is the best light for live streaming in a small room?
- What is the 3-point lighting rule for streaming?
- Will a desk lamp work as a streaming key light?
- Which is whiter, 3000K or 5000K?
- Do I need a backlight if my room is small?
- How do I stop my monitor from reflecting my stream light?
- Conclusion
What You Need
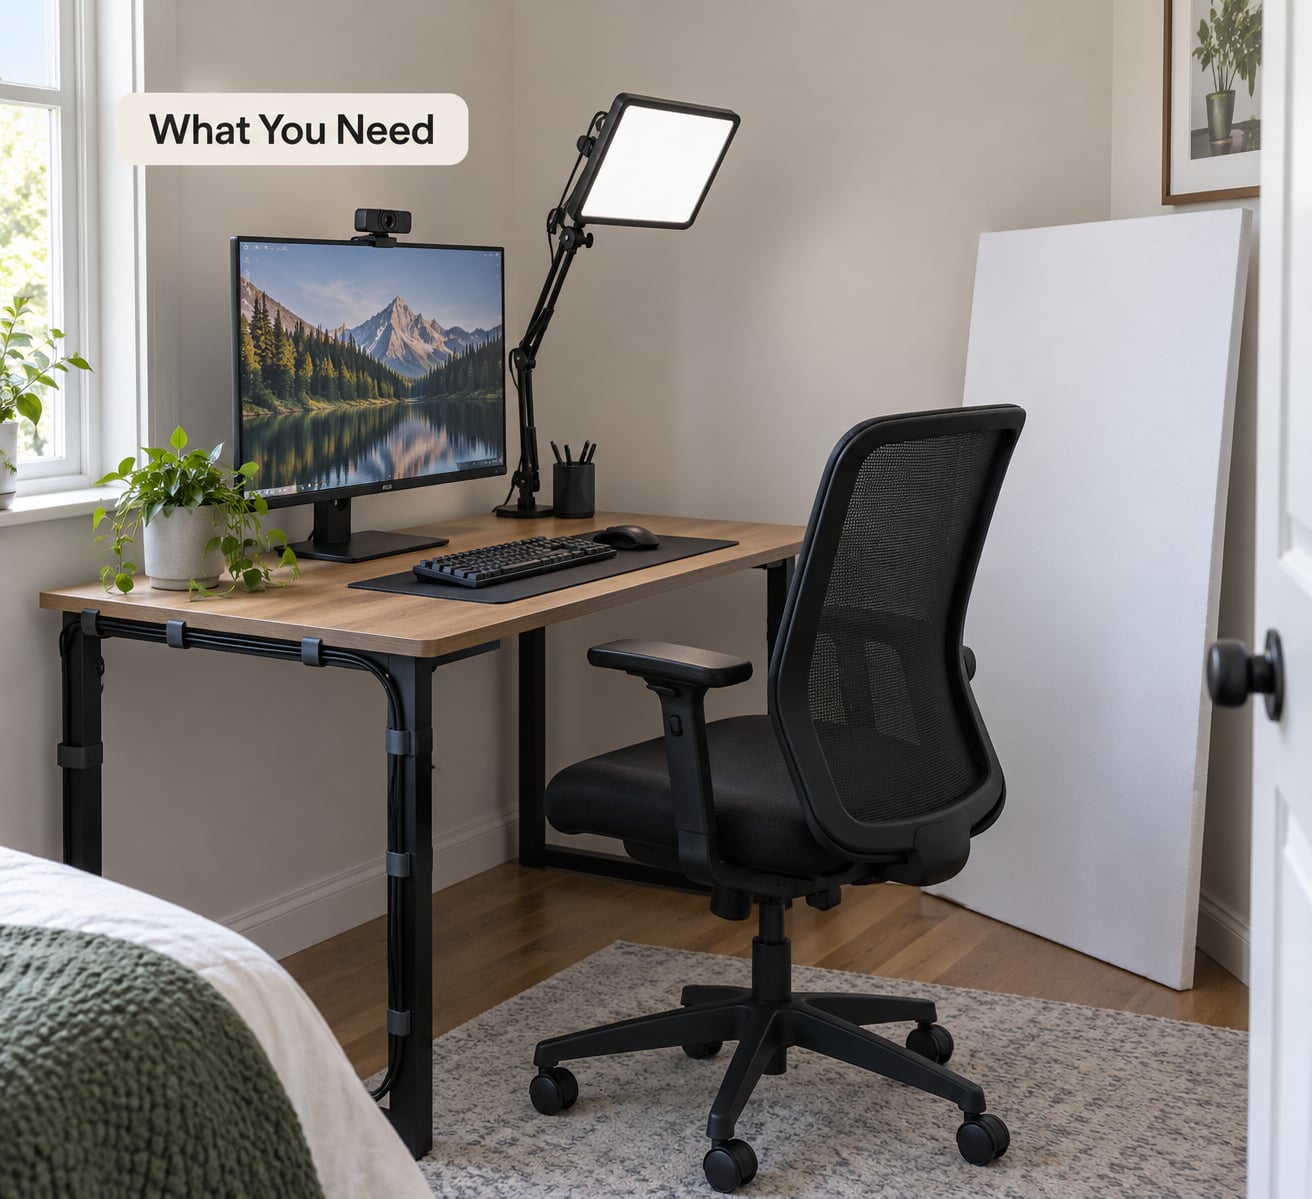
You need very little, and none of it needs to stand on the floor. Everything below mounts to a desk edge, a monitor, or a wall you are already using.
Essentials:
- One bi-color LED panel with adjustable brightness and a color temperature dial covering roughly 2700K to 6500K. Look for a desk-clamp or monitor-arm version rather than a tripod kit, because a tripod base is the first thing that will not fit.
- A white bounce surface: a 2 by 3 foot sheet of foam board from a hardware store, or simply the white wall opposite your desk. This does the job of a fill light and costs nothing.
- One background source: an LED strip behind your monitor or a second small panel aimed at the wall behind you.
- A dark cloth or blanket to drape over anything reflective, especially the monitor bezel and a glossy desk surface.
- Gaffer tape or hook-and-loop straps for cable runs, since desk-edge routing is what keeps the floor clear.
Optional but useful:
- A thin white diffuser sheet or a white shower curtain stretched over the panel, which softens the edges of the shadows on your face.
- A phone light-meter app, so you stop guessing at brightness and start reading it.
- A small tabletop or clamp light with a warm bulb for late-night streams, aimed at the wall rather than your eyes.
Room preparation:
- Measure your desk depth. Anything under about 24 inches from the monitor to the desk edge is shallow, and shallow desks push the key light closer to your face, which is where dazzle and blown-out skin come from.
- Turn off the ceiling light. It is almost always the source of the shadows under your eyes that make a stream look tired.
- Close curtains or blinds so daylight does not shift the color of your stream between 2pm and 8pm.
Safety: LED panels get warm but not hot, still keep them off bedding and fabric, run cables along the back of the desk rather than across the floor, and do not daisy-chain extension cords. If you add anything that plugs into the wall near a power strip, keep the load on one strip.
Step-by-Step
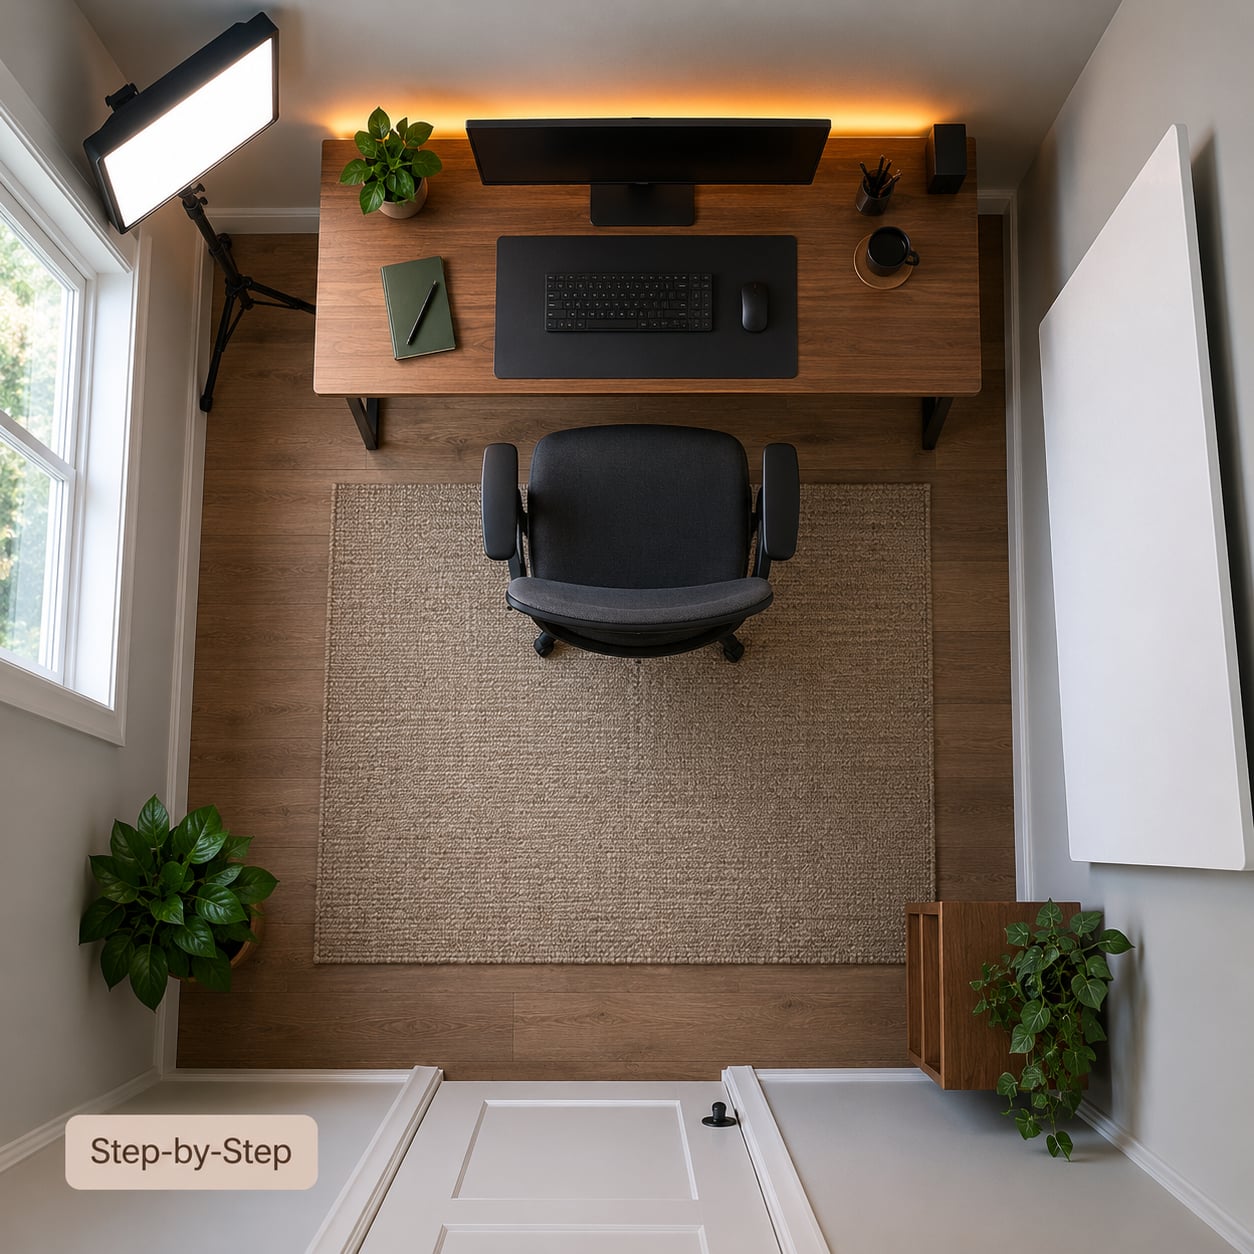
Work in this order. Each stage has a visible success check, so you can stop as soon as the image looks right instead of adding gear out of habit.
- Clear and measure the desk. Success: you have at least 24 inches of open desk depth and nothing reflective between you and the camera.
- Kill the ceiling light and close the curtains. Success: the room has one light source you control.
- Clamp the key panel to the desk edge and aim it at your face from 45 to 60 degrees to the side of the camera, a little above eye level. Success: shadows fall on the far cheek, not directly behind you.
- Prop the foam board against the opposite wall opposite the key light. Success: the shadow side of your face lifts to about half the brightness of the lit side.
- Add the background source behind and above you, pointed at the wall rather than at your back. Success: you can see a bright edge around your shoulders and head.
- Set white balance in OBS or Streamlabs before you go live, using the paper-white shortcut. Success: gray or white objects on your desk look neutral, not yellow or blue.
- Record 30 seconds and watch it back. Success: no grain, no shadow bands on the wall behind you, no glare across your monitor.
How to Position Your Key Light
Place the key light 45 to 60 degrees off the camera axis, about 30 to 45 degrees above your eye line, and 3 to 4 feet from your face. Angling it off-axis is what turns a hard nose shadow into a soft one, because the light rakes across your face instead of hitting it flat.
Height matters more than most people expect. A light at eye level flattens you completely and drops a shadow straight down into your eye sockets. A light slightly above eye level, aimed down at maybe 30 degrees, puts the light on the upper planes of your face where you want it.
If your desk is too shallow to get 3 feet of distance, move the light off to the side instead of closer to your face. A side angle at 2 feet looks better than a front angle at 18 inches, and it keeps the panel out of your eyeline.
Success looks like this: the side of your face nearest the light is clearly brighter, the shadow side still has detail, and there is no bright triangle of light on the wall behind your shoulder.
How to Add Soft Fill Light Without Flattening Your Face
Use the wall or a foam board as your fill, set at about half the brightness of your key. This is the single most useful trick in a small room, because the opposite wall is already acting as a free softbox whether you planned it or not.
Stand the foam board on the desk edge or lean it against the wall, angled slightly inward. You want it to catch the key light and throw a soft, even wash back at the shadow side of your face. A board that is too close to your face will reflect a hard hotspot onto your cheek, so move it back until the reflection spreads out.
If your wall is not white, a light beige or light gray board still works. A dark wall eats light and gives you nothing back, which is why a charcoal bedroom often produces a flat, dim key light no matter how bright the panel is.
Do not aim a second lamp straight at your face to fill. Two equal sources from different sides split the face into two halves and remove all dimension, which reads as flat rather than soft. Fill should be about one stop under the key, not matching it.
How to Light the Background in a Small Room
Point a light at the wall behind you, not at you. That single change separates you from the background and is what stops a webcam image from looking like a video call.
Three options work well in tight quarters. An LED strip taped behind the monitor rim gives a soft glow that mostly stays off your face. A second small panel clamped to a shelf behind you, aimed up at the ceiling, creates an indirect wash with no visible hotspot. A clip-on lamp bounced off the ceiling does the same thing with hardware you already own.
Keep the background one to two stops darker than your face. If the wall behind you is brighter than your face, the webcam meters for the wall, your face goes dim, and the camera adds grain to compensate.
A dark cloth or sheet behind you solves the opposite problem. If you have no space for a light behind your chair, making the background darker works nearly as well as lighting it.
How to Test and Fine-Tune the Image
Run this checklist every time you change the room: a window, a curtain, a new bulb. Small rooms drift faster than large ones, so a setup that looked right at 9pm can look flat at 2pm.
- Brightness: drop your key light until the brightest part of your forehead is bright but not clipped. Clipped highlights on skin read as a white blob at stream quality.
- Grain: if the background is grainy, your key light is too dim for the camera. Add light rather than adding brightness in software, which amplifies the noise.
- White balance: lock it manually instead of leaving it on auto. Auto shifts every time you touch a dimmer.
- Flicker: if your image pulses or bands, test with the light at low brightness, which is where cheap drivers are most likely to flicker.
- Shadows: check the wall behind you for a hard-edged shadow thrown by your own body. Angle the light higher or further to the side.
- Glare: look for a reflection of your panel on the monitor screen. Rotate the panel a few degrees or drop its brightness slightly, and drape the dark cloth over reflective surfaces.
Common Mistakes
Most small-room lighting problems come down to a handful of habits, and each one has a specific fix. Find the habit that matches your setup, change it, then re-record before you go live again.
The ceiling light mistake. A bare overhead fixture is the most common beginner error and the hardest one to unlearn. It creates the under-eye shadows nobody can fix in software, and it is usually the first thing to switch off.
LED strips as the only light. Decorative strips brighten a room but do not light a face. They read as colored haze on camera, and the camera will still add grain because your skin is not receiving enough light.
Mismatched Kelvin values. A 3200K lamp next to a 5600K panel gives you a split-tone face that looks broken. Pick one temperature for every source in the room and match white balance to it.
Ring lights in a tiny room. A ring light puts a bright dot in the middle of each pupil, and its shape reflects whatever mess is behind you straight into the lens. For a facecam at arm’s length in a small room, a side-mounted panel wins.
Light behind the monitor facing the wall. This backlights you instead of lighting you. It separates you from the wall, which is useful, but on its own it leaves your face in shadow and the camera compensating with noise.
Matching the symptom instead of the cause. Most of the guessing gets faster once you can name what you are seeing. These six cover nearly every image problem a small room produces.
- Grainy or noisy image. Not enough light is reaching the camera. Raise the key light output, or open up the aperture or drop the shutter speed, before touching anything else.
- Harsh shadows under the eyes. The ceiling light is on, or the key light sits at eye level. Kill the ceiling fixture and drop the key light so it points down from above eye height.
- Green or blue color cast. Mixed Kelvin values between sources. Match every light to one temperature, then lock white balance manually.
- Reflection across the monitor. The light is aimed near the screen, or the desk surface is glossy. Rotate the panel away, dim it slightly, and cover the desk edge with a dark cloth.
- Blown-out wall behind you. The key light is pointed at the background instead of your face. Re-aim at your face and turn the background down to one or two stops darker.
- Dazzled eyes while streaming. The panel is too close on a shallow desk. Push distance out sideways rather than toward you, and add the diffuser.
Frequently Asked Questions
What is the best light for live streaming in a small room?
One bi-color LED panel with adjustable brightness, clamped to your desk edge and placed 45 to 60 degrees off your camera axis, does most of the work in a small room. Look for a desk-clamp or monitor-arm model rather than a tripod kit, and aim for at least 250 lumens at face distance. Add a white foam board opposite it for fill and an LED strip behind your monitor for separation. Keep the ceiling light off while you do it.
What is the 3-point lighting rule for streaming?
The three-point rule is the standard camera setup, and it maps cleanly onto a streaming desk. One, the key light, angled 45 to 60 degrees off the camera axis and slightly above eye level. Two, the fill light, weaker than the key, placed on the opposite side to lift the shadow side of your face. Three, the backlight, placed behind and above you to create a bright edge that separates you from the background.
Will a desk lamp work as a streaming key light?
Yes. A desk lamp with a daylight LED bulb is the cheapest credible key light, and streamers in tiny rooms get good results with one. Point it at your face from slightly above and off to the side, then put a white foam board on the other side to bounce light back as fill. The one rule is diffusion: a bare bulb aimed at your face will blind you and flatten your skin tone, so drape something thin and white over the shade.
Which is whiter, 3000K or 5000K?
5000K is whiter. Low Kelvin values are warm and orange, 3000K being closer to household tungsten bulbs and 5600K closer to overcast daylight. For streaming, 5000K to 5600K is the safe default because it matches most webcams and any window light in the room. Warm values around 3200K give a cozy look, which works as channel branding, but match every other light in the room to the same value or your face will look split-toned.
Do I need a backlight if my room is small?
Not strictly, but it is the fastest visible improvement. A backlight puts a bright edge around your head and shoulders so you stop blending into the wall behind you, which matters more in a small room where the background is always in frame. An LED strip behind the monitor rim is enough. If you have no space behind your chair at all, skip it and make the background darker with a dark sheet instead, which achieves much of the same separation.
How do I stop my monitor from reflecting my stream light?
Angle and distance solve most of it. Rotate the light so it points at your face rather than alongside the screen, drop it a little below the top edge of the monitor, and move it sideways so the reflection falls outside the camera’s view of the panel. Then cut the remaining sources of glare by draping a dark cloth over the desk edge and any glossy surface near the screen. Dimming the panel slightly also works, since a reflection scales with brightness.
Conclusion
The most reliable small-room rig is one panel at 45 degrees, a white surface opposite it, and something glowing behind your monitor, with the ceiling light off and white balance locked. If your footage still looks wrong, change one thing first: add light to the room rather than brightness in software. Extra brightness on a dark image only amplifies grain, while added light removes it.